The Difference Between a Printed Book and a Premium Product Is One Decision About Finishing
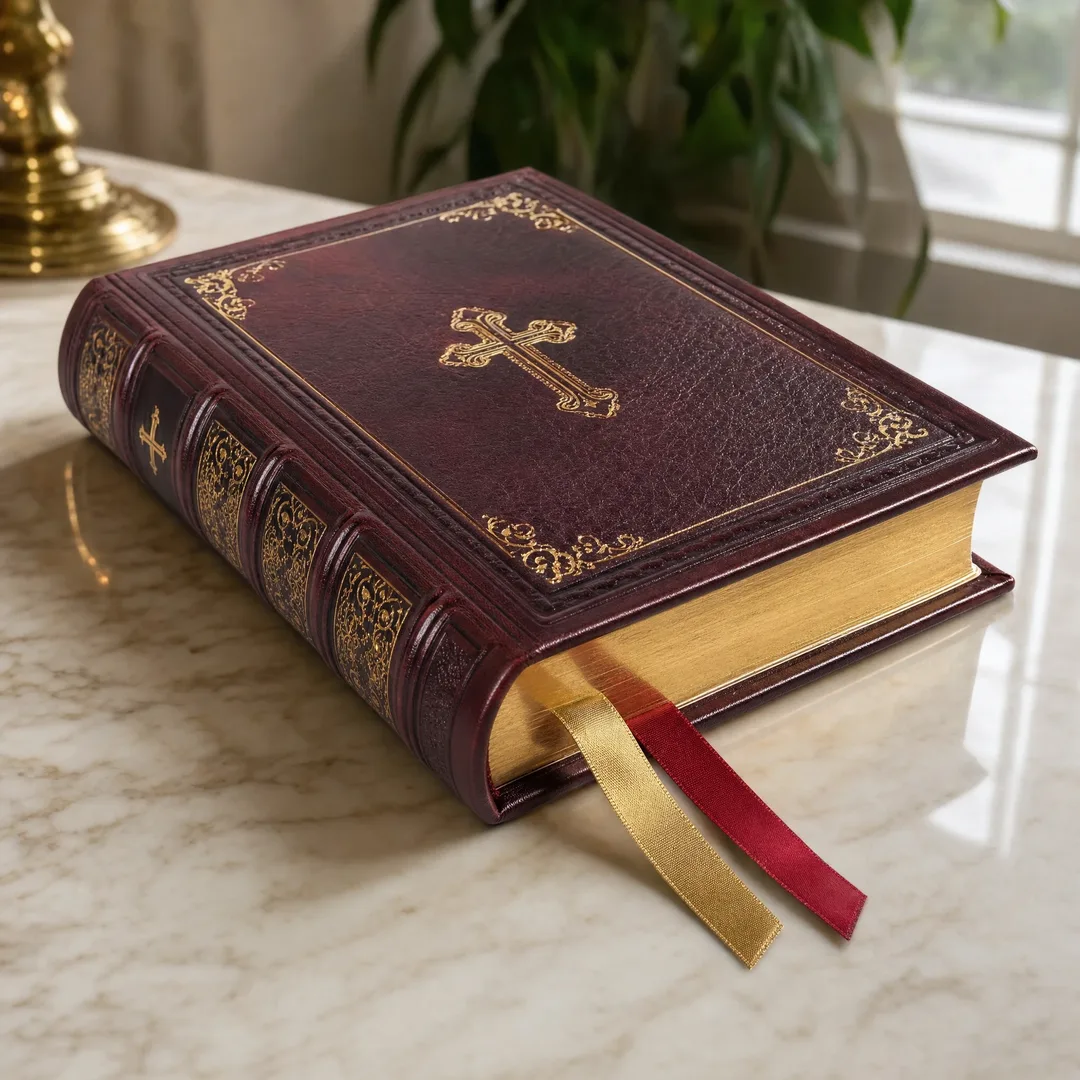
Go to a bookstore. Pick up two hardcover books with the same trim size, the same page count, roughly the same cover design quality. One retails for $24.99. The other retails for $45.00. Flip them over. The $24.99 book has a standard matte laminate cover with the title printed in black ink. The $45.00 book — same trim size, same page count — has a matte laminate cover with gold foil stamping on the title and author name, a blind debossed pattern in the background, and spot UV highlighting on a central graphic element. The printing cost difference between those two books is not $20. It is somewhere between $0.60 and $1.80 per copy. The finishing is doing the heavy lifting on perceived value.
This is what print finishing does. It takes a competently printed book and signals “this is a premium object” before the reader reads a single word. The signal is tactile — fingers register embossed texture before eyes register cover art. It is visual — gold foil catches light on a shelf from six feet away. It is durable — a book with proper lamination survives bookstore handling, shipping, and years of reading without the cover scuffing into oblivion.
If you are printing books for retail, for crowdfunding fulfillment, or for a brand that competes on perceived quality rather than price, your book print finishing options are not extras. They are the margin between a commodity paperback and a product that justifies its price. This guide covers every finishing technique a trade book publisher or self-published author can specify: foil stamping, embossing and debossing, spot UV, lamination types, edge gilding and painting, and what each one adds to the unit cost at 500 and 1,000 copies. The numbers come from working with Chinese export printers — the same printers that manufacture hardcovers for major trade publishers — and they reflect mid-2026 pricing for offset print runs.
Foil Stamping
Foil stamping is the finishing technique that separates “printed” from “produced.” A heated metal die presses a thin layer of metallic or pigmented foil onto the cover material under heat and pressure. The result is a permanent, reflective mark that cannot be replicated by any ink-based printing process — not metallic Pantone inks, not digital gold printing, not CMYK simulation. Real foil stamping has a mirror-like reflectivity and a physical depth that ink sits on top of the paper, not in it.
How Foil Stamping Works in Production
The process starts with a metal die — typically magnesium for runs under 5,000 copies, brass for longer runs or finer detail. The die is mounted on a heated platen on a foil stamping press. A roll of foil — a thin polyester carrier film with a metallic or pigment layer — feeds between the die and the cover material. The heated die presses down at 100°C to 150°C with several tons of pressure. The heat activates an adhesive layer on the foil, the pressure transfers it to the cover, and the carrier film peels away, leaving the foil bonded exactly where the raised areas of the die made contact.
Magnesium dies, the standard choice for book cover foil stamping at print runs under 5,000 copies, cost roughly $80 to $150 for a single title block — a die with the book title, author name, and publisher logo on one plate. Brass dies cost $200 to $400 but last for 100,000+ impressions and produce sharper detail on fine serif typefaces and hairline rules. For a first print run of 500 or 1,000 copies, magnesium is the correct choice. The die is a one-time cost that can be reused on reprints.
Foil Colors and the Perception Code
Gold foil on a dark cover signals “literary fiction” or “premium nonfiction.” Silver foil on a black or white cover signals “modern” or “technical.” Rose gold foil on a pastel cover signals “lifestyle” or “wellness.” Copper foil on kraft or earth-tone stock signals “artisanal” or “sustainable.” These are not rules — they are observed patterns from trade publishing, and they work because readers have been trained by thousands of books to read finish as genre.
Beyond metallic foils, pigmented foils — matte black, gloss white, opaque red, high-gloss colors — are available at roughly the same cost. Holographic foil, which shifts color with viewing angle, costs roughly 30% to 50% more than standard metallic foil and requires a larger minimum order on the foil roll itself. Most Chinese export printers stock gold, silver, rose gold, copper, black matte, and white gloss foil as standard inventory. Specialty colors — specific Pantone-matched pigments — require a foil order of typically 5,000 to 10,000 meters, which adds $150 to $300 and 10 to 14 days of lead time.
One specification worth knowing: foil stamping requires a smooth substrate. It bonds poorly to uncoated papers with heavy tooth and does not adhere to soft-touch lamination without a primer layer. The standard stack is foil stamped onto matte or gloss lamination, which provides the smooth, non-porous surface the foil needs. If you want foil on an uncoated, textured cover stock, expect the printer to recommend a laminated base layer first — or to warn you that the foil edges will show slight feathering on the rough paper surface. For a deeper dive into foil types, die materials, and design specifications, see our complete foil stamping guide .
Embossing and Debossing
Embossing raises a design element above the surface of the cover. Debossing presses it below. Both techniques use a metal die pair — a male die (the raised shape) and a female counter-die (the recessed cavity) — that sandwich the cover material under pressure, permanently deforming the paper or board into a three-dimensional shape. The effect is tactile and, importantly, visible under any lighting condition. A foil-stamped title disappears under glare from a bookstore’s track lighting; an embossed title is legible from any angle because the reader’s eye reads the shadow cast by the raised surface.
Blind Embossing vs Registered Embossing
Blind embossing is embossing without ink or foil — the raised design is the same color as the surrounding cover material. It is subtle, elegant, and the default choice for brand marks, repeating patterns, and design elements you want the reader to discover by touch rather than sight. Blind embossing on a dark cover, especially black or navy cloth, is nearly invisible from a distance and creates a moment of tactile discovery when the reader picks the book up.
Registered embossing aligns the embossed area precisely with a printed or foil-stamped element. A gold foil title with the letters embossed to match — so the foil sits on a raised surface — is registered embossing. It requires two passes: foil stamping first, then a second pass with the embossing die aligned to the foil within a tolerance of roughly 0.3 mm. This is the technique behind the most expensive-looking book covers in any bookstore. It also adds roughly 40% to 60% to the combined foil-plus-embossing cost versus doing either technique alone, because it doubles the machine time and requires a highly skilled operator to register the two impressions.
Debossing: Depth Without Flash
Debossing presses the design into the cover, creating a recessed impression. On thick cover board — 2.5 mm to 3.0 mm greyboard under cloth or paper wrap — debossing creates deep, crisp impressions that hold their shape for the life of the book. On thinner paperback covers — 250 to 300 GSM C1S board — the deboss is shallower because there is less material to displace, but the effect is still visible and tactile.
Debossing with foil — where foil is applied inside the recessed area — is called foil debossing. The foil sits below the cover surface, protected from abrasion. It is less reflective than surface-level foil stamping because the recessed surface catches less light, but it is also more durable. No amount of shelf wear, shipping friction, or reader handling will scratch foil that sits 0.5 mm below the cover surface.
Die costs for embossing and debossing are comparable to foil stamping dies — $80 to $200 for a magnesium die pair, $200 to $500 for brass. The per-unit cost for a single embossed or debossed area at 500 copies runs roughly $0.25 to $0.50; at 1,000 copies, $0.15 to $0.35. Detailed breakdowns for each technique, including design file requirements and minimum detail sizes, are in our embossing guide and debossing guide .
Spot UV
Spot UV is the finishing technique that creates the highest contrast between glossy and matte surfaces on a single cover. A clear, high-gloss UV-cured coating is applied to specific areas of the cover — the title text, a central image, a graphic element — while the surrounding area remains matte. The result is a cover where only the highlighted elements shine.
How Spot UV Works Visually
The standard application is spot UV on matte lamination. The entire cover receives a matte laminate layer, which gives it a soft, non-reflective surface. Then a screen-printed UV coating is applied to specific areas — a technique similar to screen printing, using a mesh screen to deposit the UV varnish only where desired. The coated areas pass under a UV curing lamp that hardens the varnish instantly into a clear, high-gloss layer.
The visual effect is strongest when the contrast is highest: spot UV on matte black creates a glossy black-on-matte-black effect that is impossible to photograph accurately because the gloss shifts with viewing angle. On photography or art book covers, spot UV can be applied selectively to highlight specific image areas — a subject’s eyes, the title text, a central figure — while the rest of the image remains matte. This technique, called gloss-on-matte selective highlighting, is common on premium photography monographs and art book covers.
Compared to foil stamping, spot UV is less expensive per unit — roughly $0.15 to $0.35 at 500 copies, $0.08 to $0.20 at 1,000 — because there is no metal die to manufacture. The screen used for spot UV application costs $40 to $80 to produce and can be reused on reprints. Spot UV also does not require the same surface smoothness that foil stamping does; it adheres well to matte lamination and uncoated papers alike. Its limitation is that it does not add metallic reflectivity, only gloss. If the cover design calls for a metallic element, foil stamping or a combination of foil plus spot UV — which is technically possible but requires careful registration — is the answer. Our spot UV printing guide has technical specifications for file preparation and minimum line weights.
Lamination: Gloss, Matte, and Soft-Touch
Lamination is the most common finishing technique on trade book covers, and it is so standard that many publishers do not think of it as a “finish” at all. But choosing between gloss, matte, and soft-touch lamination is a real decision with real consequences for durability, shelf appearance, and perceived quality. The wrong choice can make a premium book look cheap or a practical book look pretentious.
Gloss Lamination
Gloss lamination applies a clear, high-shine plastic film to the cover. It makes colors more saturated — black looks deeper, red looks richer, photography looks sharper — because the glossy surface reduces light scatter. Gloss lamination is also the most durable option for books that will be handled frequently: textbook covers, library editions, restaurant menus, children’s books. Fingerprints wipe off. Scuffs are less visible than on matte because the glossy surface does not abrade as obviously.
The downside of gloss lamination is glare. Under direct light — bookstore track lighting, a photographer’s softbox, a window display — the glossy surface creates reflections that obscure the cover design. A gloss-laminated cover photographed for an Amazon listing looks like it has a foggy patch over the center unless the photographer angles the light carefully. For books sold primarily online, this is a minor concern. For books sold in physical retail where the cover has to sell itself on a shelf, matte lamination eliminates the glare problem entirely.
Matte Lamination
Matte lamination gives the cover a soft, non-reflective surface. Colors appear slightly less saturated than under gloss — a 5% to 10% perceived reduction in vibrancy is typical — but the cover is readable from any angle under any light. This is why literary fiction, narrative nonfiction, and trade paperbacks overwhelmingly use matte lamination: the cover does not compete with the store lighting.
Matte lamination has one practical vulnerability: it scuffs white. If a matte-laminated cover rubs against another matte surface during shipping, the friction creates a visible white mark — essentially a micro-abrasion in the matte film. Gloss lamination scuffs less visibly because scratches on a glossy surface blend into the reflection pattern. For books shipping in bulk — cartons of 24 or 36 copies rubbing against each other during ocean transit — gloss lamination survives the journey better than matte. Shrink-wrapping individual copies or bundling in groups of five largely eliminates this issue, and most export printers do this as standard for matte-laminated covers.
Soft-Touch Lamination
Soft-touch lamination — sometimes called velvet lamination or tactile laminate — applies a matte film with a velvety, rubbery surface texture. It feels expensive. The reader’s fingers register the texture before the reader’s eyes register the cover art. This is why premium business books, high-end journals, luxury brand publications, and photography books use it: the tactile signal of quality is immediate and subliminal.
Soft-touch lamination costs more than gloss or matte — roughly $0.25 to $0.55 per copy at 500 units, $0.15 to $0.35 at 1,000, versus $0.08 to $0.20 for standard matte or gloss. The premium is in the film itself, which is a specialized polypropylene laminate imported from manufacturers in Japan, Germany, or Korea. Not all Chinese printers stock soft-touch laminate as standard inventory; confirm availability before committing to it in a cover design.
Soft-touch has two practical limitations. First, it shows fingerprints and skin oils more readily than matte or gloss, which matters for books that will be handled extensively — cookbooks in a kitchen, field guides, textbooks. Second, it cannot receive foil stamping directly because the rubbery surface does not provide a stable substrate for foil adhesion. If you want foil on a soft-touch cover, the printer must apply the foil first, then laminate over it — which flattens the foil’s texture — or use a spot-printed primer layer under the foil area, which adds a production step and cost. For a complete comparison of lamination types including thickness options and application processes, see our lamination guide .
Edge Gilding and Edge Painting
Edge gilding and edge painting are the finishing techniques that signal “this book is an object, not just a container for text.” They are the most expensive per-unit finishing options and the ones that create the strongest impression of luxury. A book with gold-gilded edges on a shelf, spine-out, looks identical to any other hardcover. Turn it so the page edges face the viewer — in a display, on a coffee table, in a photographer’s flat lay — and the gilded edge catches the light and announces itself as something special.
Edge Gilding
Edge gilding applies a thin layer of metal — historically gold leaf, now typically a metallic foil or pigment — to the trimmed edges of the book block. The process requires the book block to be clamped under extreme pressure while the edges are sanded smooth, a primer or size is applied, and the foil or leaf is laid down and burnished. Each of the three edges — top, fore-edge, bottom — is gilded separately, though in practice all three are almost always gilded together because a book with only the top edge gilded looks incomplete.
Real gold leaf gilding still exists — it is used on Bibles, high-end limited editions, and fine press books — but the vast majority of trade books with gilded edges use a metallic foil transfer process that produces a visually identical result at a fraction of the cost. The difference is that real gold leaf does not tarnish or oxidize over decades, while metallic foil gilding can develop slight edge wear over time, particularly on the bottom edge that rests on shelves.
Edge gilding is expensive because it is slow. Each book block must be clamped, sanded, sized, foiled, and burnished individually. There is no high-speed automated process for edge gilding comparable to the speeds of offset printing or perfect binding. At 500 copies, edge gilding adds roughly $0.80 to $1.50 per copy; at 1,000 copies, $0.50 to $1.00 per copy. The setup cost — preparing the clamping jig and foil stock — runs $150 to $300 regardless of quantity. Edge gilding is the finishing technique with the strongest correlation between presence and retail price. A hardcover with gilded edges commands a $5 to $15 retail premium over the same book without them.
Edge Painting
Edge painting applies a solid color — ink or dye — to the trimmed edges of the book block instead of a metallic foil. The effect is a colored edge that coordinates with or contrasts against the cover design. A book with a navy blue cover and neon orange painted edges is a deliberate design statement. A book with edges painted to match the dominant color of the cover illustration is a subtler coordination that readers notice when they open the book.
Edge painting is less expensive than edge gilding — roughly $0.40 to $0.80 per copy at 500 copies, $0.25 to $0.60 at 1,000 — because the material cost is lower (ink instead of metallic foil) and the application is less demanding (the color can be applied by spraying or rolling rather than the precise foil transfer required for gilding). Setup costs run $80 to $150 for color matching and process calibration.
One caveat: edge painting is most effective on books with thick paper — 100 GSM or above — and substantial page counts of 200 pages or more. On thin paper or short books, the edge surface area is too small for the color to register as a design element rather than an oddity. A 120-page book on 80 GSM paper with painted edges looks like someone colored the edge with a marker. A 300-page book on 120 GSM paper with painted edges looks like a considered design decision. For luxury packaging and special edition considerations that complement edge finishing, our luxury packaging guide covers presentation options for high-end projects.
Cost Comparison: What Each Finish Adds at 500 and 1,000 Copies
The per-unit costs below are additive to the base printing cost for a standard 6×9 hardcover with cloth cover, 200 pages, at a Chinese export printer — mid-2026 pricing. Setup costs (dies, screens, jigs) are one-time charges that amortize across reprints. All figures in USD.
Finishing Technique
Setup/Die Cost (One-Time)
Per-Unit at 500 Copies
Per-Unit at 1,000 Copies
Total Added Cost (500 Copies)
Total Added Cost (1,000 Copies)
Foil Stamping (single area, magnesium die)
$80–150
$0.30–0.60
$0.20–0.40
$230–450
$280–550
Foil Stamping + Embossing (registered)
$160–350
$0.50–1.00
$0.35–0.70
$410–850
$510–1,050
Blind Embossing (single area)
$80–200
$0.25–0.50
$0.15–0.35
$205–450
$230–550
Blind Debossing (single area)
$80–200
$0.25–0.50
$0.15–0.35
$205–450
$230–550
Spot UV (single screen)
$40–80
$0.15–0.35
$0.08–0.20
$115–255
$120–280
Gloss or Matte Lamination (whole cover)
$0
$0.08–0.20
$0.05–0.15
$40–100
$50–150
Soft-Touch Lamination
$0
$0.25–0.55
$0.15–0.35
$125–275
$150–350
Edge Gilding (3 edges, metallic foil)
$150–300
$0.80–1.50
$0.50–1.00
$550–1,050
$650–1,300
Edge Painting (3 edges, solid color)
$80–150
$0.40–0.80
$0.25–0.60
$280–550
$330–750
The most cost-efficient combination for a premium hardcover at 1,000 copies: matte lamination ($50 to $150 total) plus foil stamping on the title area ($280 to $550 total including die) for a combined finishing cost of $0.33 to $0.70 per copy. That combination produces a book that looks and feels significantly more expensive than its actual production cost.
The most premium combination that still makes economic sense at 1,000 copies: soft-touch lamination plus gold foil stamping with registered embossing on the title, plus edge gilding. Total finishing cost: roughly $0.90 to $2.00 per copy, or $900 to $2,000 on the full run. That adds roughly $3 to $6 to the retail price if the publisher maintains standard margins — and in practice, books with this finishing combination retail for $10 to $20 above equivalent unadorned hardcovers. For broader printing cost context that includes paper, binding, and print run scaling, see our book printing cost guide and binding methods comparison .
FAQ: Book Print Finishing Choices
Can I combine multiple finishing techniques on one cover?
Yes. The most common premium combination is matte lamination with gold foil stamping and spot UV — three techniques on one cover. The practical limit is determined by registration tolerance (each additional technique requires alignment with the previous ones, and cumulative tolerance drift can make elements visibly misaligned) and cost (each technique adds setup time and per-unit cost). Four techniques — matte lamination, foil stamping, registered embossing, and spot UV — is the practical maximum before registration issues and cost escalation make the result worse, not better. The printer’s prepress team will advise if a proposed combination exceeds their registration capability with the specific cover material and board thickness you have chosen.
Does foil stamping fade or wear off over time?
Properly applied foil stamping on a laminated cover does not fade, peel, or wear off under normal handling. The foil is bonded into the laminate surface under heat and pressure — it is not sitting on top of the surface like ink. The two failure modes are: foil applied to an unlaminated, uncoated cover stock (which lacks the smooth surface foil needs for adhesion), and foil applied with insufficient heat or pressure (operator error at the press). Both are manufacturing defects, not characteristics of foil stamping itself. Books foil-stamped by competent printers in the 1980s still have intact foil today. For print-ready file requirements that affect foil stamping registration, see our print-ready file preparation guide .
What is the minimum print run for foil stamping or embossing to make economic sense?
The economic breakpoint for foil stamping, embossing, and debossing is around 300 to 500 copies. Below 300 copies, the die cost — which is fixed regardless of quantity — becomes the dominant cost component, and the per-unit finishing cost can exceed $1.50. At 300 copies with an $80 magnesium die and $0.60 per-unit stamping cost, the total finishing cost is $260 ($0.87 per copy). At 100 copies, the same die and per-unit cost produce a total of $140 ($1.40 per copy). The die cost is the same; the per-unit cost of running the stamping press is roughly the same per impression; the only variable that changes with quantity is how many copies spread the die cost. If your print run is under 300 copies, spot UV — which has a lower setup cost and no metal die — is the more economical way to add a premium finish element. Our MOQ guide covers how quantity thresholds affect every cost component in book printing.
Can I foil stamp on the spine only, not the front cover?
Yes, and this is actually a common specification for library editions and trade paperbacks where the spine needs to be readable on a shelf but the cover design does not call for foil. The die is smaller — spine-only dies are typically $50 to $80 — and the per-unit cost is roughly 60% to 70% of a full cover foil stamp because the press setup and foil consumption are lower. One caveat: the spine foil area is narrow, usually 8 to 15 mm wide depending on the book’s page count and paper thickness. Very fine serif typefaces below 8 points may not reproduce cleanly on a spine-only foil stamp because the narrow die surface concentrates heat unevenly. Stick to sans-serif or medium-weight serif typefaces at 9 points or above for spine foil.
How do I specify finishing in my print quote request?
List each finishing technique with the specific area, material, and color. A complete finishing specification for a quote request looks like this: “Matte lamination on entire cover. Gold foil stamping on front cover title and author name. Blind debossing on front cover background pattern (supplied as vector file). Spot UV on front cover central illustration area. No finishing on back cover except matte lamination. Spine: gold foil stamping on title only.” Vague requests — “make it look premium” or “add some finishing” — will get you a vague quote. The printer needs to know exactly what finishing operations to include in the production estimate, because each one adds machine time, material cost, and a quality control checkpoint. For the complete prepress workflow from design file to finished book, consult our print-ready artwork preparation guide .