Why the Best Print Projects All Have One Thing in Common
You’ve probably picked up a business card that felt impossibly smooth. Or a book cover where the title seemed to float above the matte background, catching light at just the right angle. That wasn’t an accident. It was UV coating — and once you know what to look for, you’ll start seeing it everywhere.
I’ve spent years in the printing industry, and I can tell you this: the difference between a project that looks “fine” and one that stops people in their tracks often comes down to a single finishing choice. UV coating is that choice more often than not. It’s not just about making things shiny. It’s about protection, contrast, texture, and the subtle cues that tell someone this was worth doing right.
In this guide, I’m going to walk you through everything you need to know about UV coating — what it actually is from a chemical standpoint, how the different types compare, when to use each one, and what the production process looks like from file prep to finished piece. By the end, you’ll know exactly which finish to spec for your next project, and more importantly, why.
What Is UV Coating? A Deeper Look at the Chemistry
Most people describe UV coating as a “clear liquid that gets hardened by ultraviolet light.” That’s accurate, but it barely scratches the surface. Let me explain what’s actually happening at the molecular level, because understanding this will help you make smarter decisions about when to use it.
UV coating starts as a liquid blend of three key components: acrylic resin oligomers (the backbone that gives the coating its structure), reactive monomers (smaller molecules that act as solvents but participate in the reaction rather than evaporating), and photoinitiators (light-sensitive compounds that kick everything off). Unlike traditional solvent-based coatings where 50% or more of the applied material evaporates into the air, UV coating is a 100% solids system. Almost everything you apply stays on the sheet.
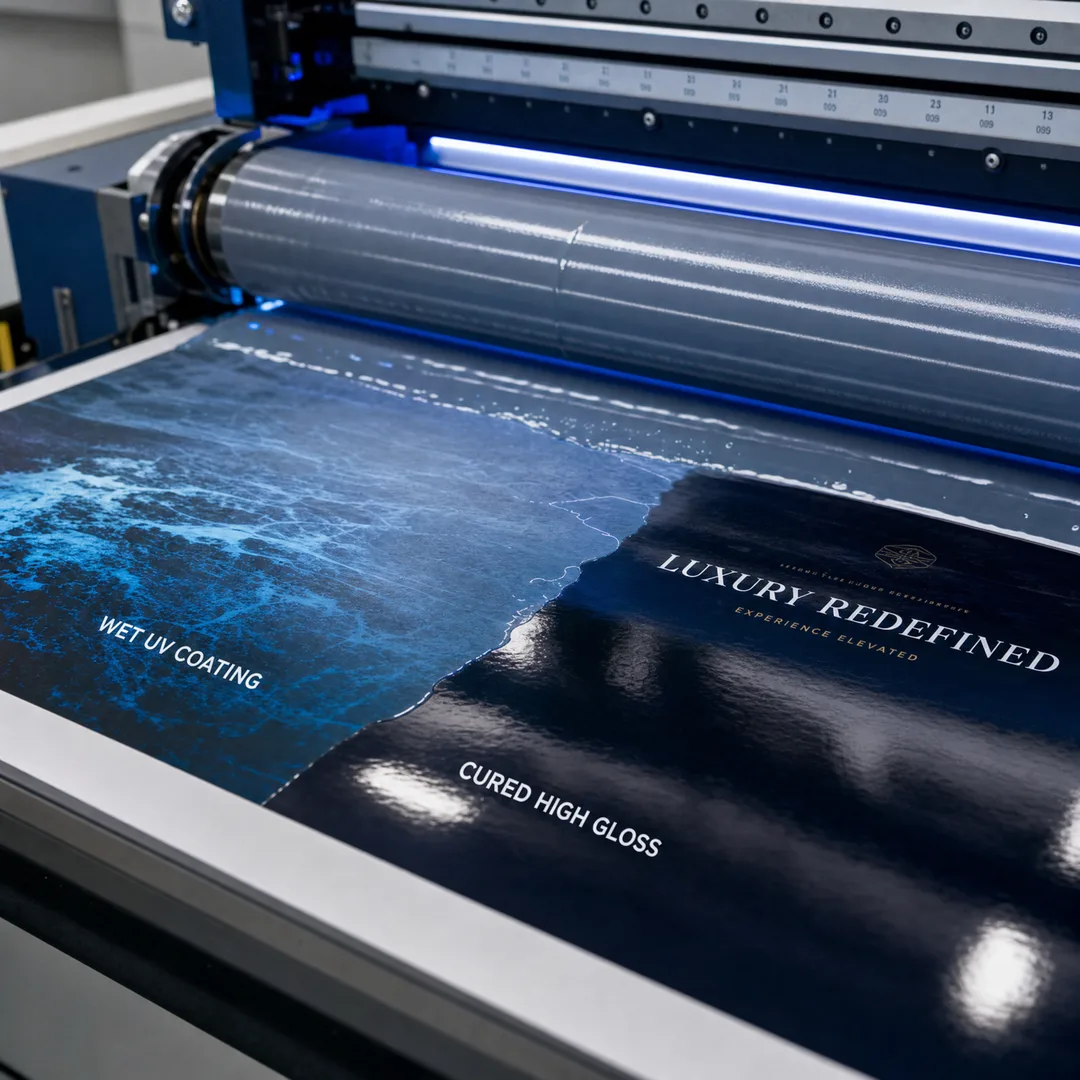
When that liquid hits UV light — typically in the UVA range between 320 and 400 nanometers — the photoinitiators absorb the energy and fragment into highly reactive free radicals. These radicals attack the double bonds in the monomers and oligomers, triggering what chemists call free-radical polymerization. In plain English: the individual molecules start linking arms with their neighbors, forming long, cross-linked chains. Within a fraction of a second, the entire layer transforms from a viscous liquid into a hard, glass-like solid.
This is fundamentally different from how aqueous coatings work. Aqueous coatings rely on water evaporation — the polymers are already formed; they just need the water to leave before they can form a film. UV coating builds its polymer network on the spot, which is why the resulting layer is denser, harder, and more chemically resistant. It’s the difference between stacking pre-made bricks and pouring reinforced concrete.
There’s also a lesser-used mechanism called cationic polymerization, where UV light generates a strong acid that opens ring-shaped epoxide molecules to form the polymer chain. Cationic curing continues even after the UV light is removed — it can keep going for hours or even days. But it’s sensitive to moisture and temperature, so free-radical systems dominate commercial printing.
The curing speed is what makes UV coating so practical at scale. We’re talking milliseconds to seconds, not minutes to hours. A printed sheet can go from wet coating to bone-dry, ready-to-handle surface in less time than it takes you to read this paragraph. That speed changes everything about production workflow.
Key Advantages of UV Coating — Beyond the Shine
When people ask me why they should choose UV coating, I usually start with the durability angle and then work backward to the aesthetic stuff. Here’s why.
Scratch and Abrasion Resistance That Actually Matters
A UV-cured surface has a pencil hardness rating that’s significantly higher than aqueous or varnish alternatives. What does that mean in practice? Business cards that go through wallets, mailrooms, and trade show badge holders still look new months later. Book covers that sit on bookstore shelves under fluorescent lights don’t develop that sad, scuffed patina. Direct mail pieces survive the postal sorting machinery without looking like they lost a fight.
I’ve seen UV-coated postcards come through a bulk mail run looking virtually untouched, while uncoated versions of the same card came back with ink transfer, corner dings, and enough surface abrasion to make the design look ten years old. That durability difference is real and measurable.
Color Enhancement That’s Almost Unfair
There’s a reason gloss UV coating is sometimes called the “cheat code” for rich blacks and deep blues. The smooth, glass-like surface fills the microscopic valleys in the paper that would otherwise scatter light. Instead of bouncing off in random directions, more light reflects back toward the viewer in a controlled way. The result: blacks look deeper, colors look more saturated, and photographs gain a level of depth that the same ink on the same paper simply can’t achieve without coating.
Matte UV takes this in a different direction. It scatters light evenly across the surface, eliminating glare while still protecting the ink underneath. For luxury brands that want sophistication without shouting, matte UV is often the sweet spot.
Instant Cure, Instant Throughput
In production printing, time is literally money. Traditional coatings and varnishes need drying time — sometimes hours, occasionally overnight for heavy coverage jobs. That means floor space for drying racks, longer turnaround commitments, and the constant risk of offsetting (where wet ink transfers from one sheet to the back of another). UV coating eliminates all of that. The sheet exits the UV lamp assembly completely dry and can go straight to cutting, folding, or binding. For rush jobs, this isn’t a nice-to-have — it’s the only practical option.
Environmental Profile That Holds Up
This one surprises people. “UV coating is chemical-based — how is that eco-friendly?” Here’s the logic: because UV coatings are 100% solids systems with no water or solvent evaporation, they emit near-zero volatile organic compounds. Traditional solvent-based coatings can release significant VOCs during drying, contributing to smog formation and workplace air quality concerns. UV curing uses substantially less energy than thermal drying ovens, too. And modern UV formulations keep getting better — many are now formulated without hazardous air pollutants and are compatible with recyclable and repulpable paper streams.
At EcoPrinting, we’ve seen firsthand how UV coating lets our clients achieve premium finishes without compromising their sustainability commitments. It’s one of those rare cases where the better-performing option is also the more environmentally responsible one.
Tactile Differentiation
We tend to talk about printing in visual terms, but touch matters more than most designers realize. A UV-coated surface creates a distinct tactile experience — whether it’s the slick glassiness of high-gloss, the velvety drag of soft-touch matte, or the dramatic texture contrast of spot UV over an uncoated background. In an increasingly digital world, physical texture is a differentiator that screens can’t replicate.
Types of UV Coating — Gloss, Matte, and the Magic of Spot UV
Not all UV coatings are created equal, and picking the wrong one is an expensive mistake. Here’s how the main options break down.
Gloss UV Coating
Gloss UV is the showstopper. It delivers an ultra-high-sheen, almost wet-looking surface that makes colors jump off the page. The light reflection is so pronounced that deep blacks can look like liquid ink floating on glass. It’s the go-to choice for promotional materials, magazine covers, postcards, and anything that needs to grab attention in a split second.
The trade-off: gloss UV shows fingerprints like a crime scene, and it can create glare that makes text harder to read under bright lights. For anything text-heavy, I usually steer clients toward matte or at least spot gloss rather than full flood gloss.
Matte UV Coating
Matte UV achieves something that sounds contradictory: it protects like a hard coating while looking like there’s barely anything there. The surface scatters light rather than reflecting it, which eliminates glare and gives the piece a quiet, refined presence. It photographs beautifully because there’s no hotspot to fight with your lighting setup.
Luxury brands love matte UV for a reason — it telegraphs confidence without needing to yell. It also pairs brilliantly with spot UV, which I’ll get to in a moment. The main downside: matte finishes are slightly more prone to showing scuffs than gloss, though they’re still vastly more durable than uncoated paper.
Spot UV (Selective UV Coating)
This is where things get fun. Spot UV means applying the glossy coating only to specific areas of the design — a logo here, a title there, maybe a subtle pattern in the background. The contrast between the glossy coated areas and the matte or uncoated surrounding surface creates a visual and tactile dimension that’s hard to describe but immediately impressive when you hold it.
Pairing spot UV with a matte laminated or soft-touch background is one of the most effective combinations in commercial printing. The glossy areas seem to float above the velvety background. Your eye goes straight to them. For book covers, business cards, and premium packaging, this technique can elevate a design from professional to unforgettable.
There’s also a variant called raised spot UV (or 3D spot UV), where a thicker layer of varnish is applied to create actual physical texture — not just a visual gloss difference but a palpable raised surface. It’s more expensive and requires tighter registration tolerances, but for luxury packaging and high-end invitations, the effect is worth every penny.
Specialty UV Finishes
Beyond the big three, the UV coating world keeps expanding. Soft-touch UV creates a velvety, almost rubbery surface that people can’t stop touching. Glitter UV embeds reflective particles for a subtle sparkle. Textured UV can mimic leather grain, sand, or fabric. These specialty finishes tend to cost more and have longer lead times, but for the right project, they create an experience that no digital screen can match.
UV Coating vs. Lamination vs. Aqueous Coating — A Three-Way Comparison
This is probably the question I get asked most often: which finish should I actually use? The answer depends on your project’s priorities, but let me lay out the honest trade-offs between the three main contenders.
Feature
UV Coating
Lamination
Aqueous Coating
Application method Liquid applied, UV-cured
Plastic film heat-pressed onto sheet
Water-based liquid, heat-dried
Finish options Gloss, matte, spot, soft-touch, textured
Gloss, matte (silk), soft-touch
Gloss, matte, soft-touch (flood only)
Spot application Yes — spot UV is a major advantage
No — full sheet only
No — flood coat only
Durability (scratch) Excellent — hard, glass-like surface
Good — plastic film is flexible
Moderate — resists scuffs and fingerprints
Moisture resistance Moderate — resists light spills
Excellent — near-waterproof
Low — water-based, not moisture-resistant
Fold friendliness Poor — can crack on fold lines
Good — film flexes without cracking
Excellent — very flexible
Thickness added Minimal — microns only
Noticeable — film adds heft
Minimal — thin polymer film remains
Curing speed Instant — fractions of a second
Fast — heat-set within seconds
Fast — heat-assisted evaporation
VOC emissions Near-zero (100% solids)
Low — film is inert
Low — water-based
Relative cost Moderate to high
Moderate to high
Low — most economical
Best for Visual impact, spot effects, fast turnaround
Maximum protection, moisture-prone environments
Budget-conscious projects, text-heavy pieces, folded items
When to Choose UV Coating Over Lamination
Go with UV coating when visual impact matters more than moisture protection. Business cards with spot UV logos, book covers that need a premium feel, postcards where color pop drives response rates — these are UV coating’s sweet spots. If your piece needs to fold, though, think twice. UV coating’s hardness means it can crack along fold lines unless you pre-score carefully. Lamination handles folding much better.
When to Choose UV Coating Over Aqueous
UV beats aqueous on durability, sheen level, and the ability to do spot applications. Aqueous wins on cost and foldability. If you’re printing a high-volume brochure that will be folded and handled briefly, aqueous is probably the smarter economic choice. If you’re printing a premium catalog cover or a keepsake piece that needs to last, UV is worth the extra spend.
The Hybrid Approach
Here’s something the comparison table doesn’t capture: you don’t have to pick just one. Some of the best results come from combining finishes. A matte lamination base layer with spot UV on key elements gives you the best of both worlds — the durability and moisture resistance of lamination with the dramatic visual contrast of spot UV. At EcoPrinting, this is one of our most-requested finishing combinations for premium book covers and packaging.
Where UV Coating Shines — Real-World Applications
UV coating isn’t a one-size-fits-all solution, but there are several applications where it’s consistently the right call. Here’s where I see it deliver the most value.
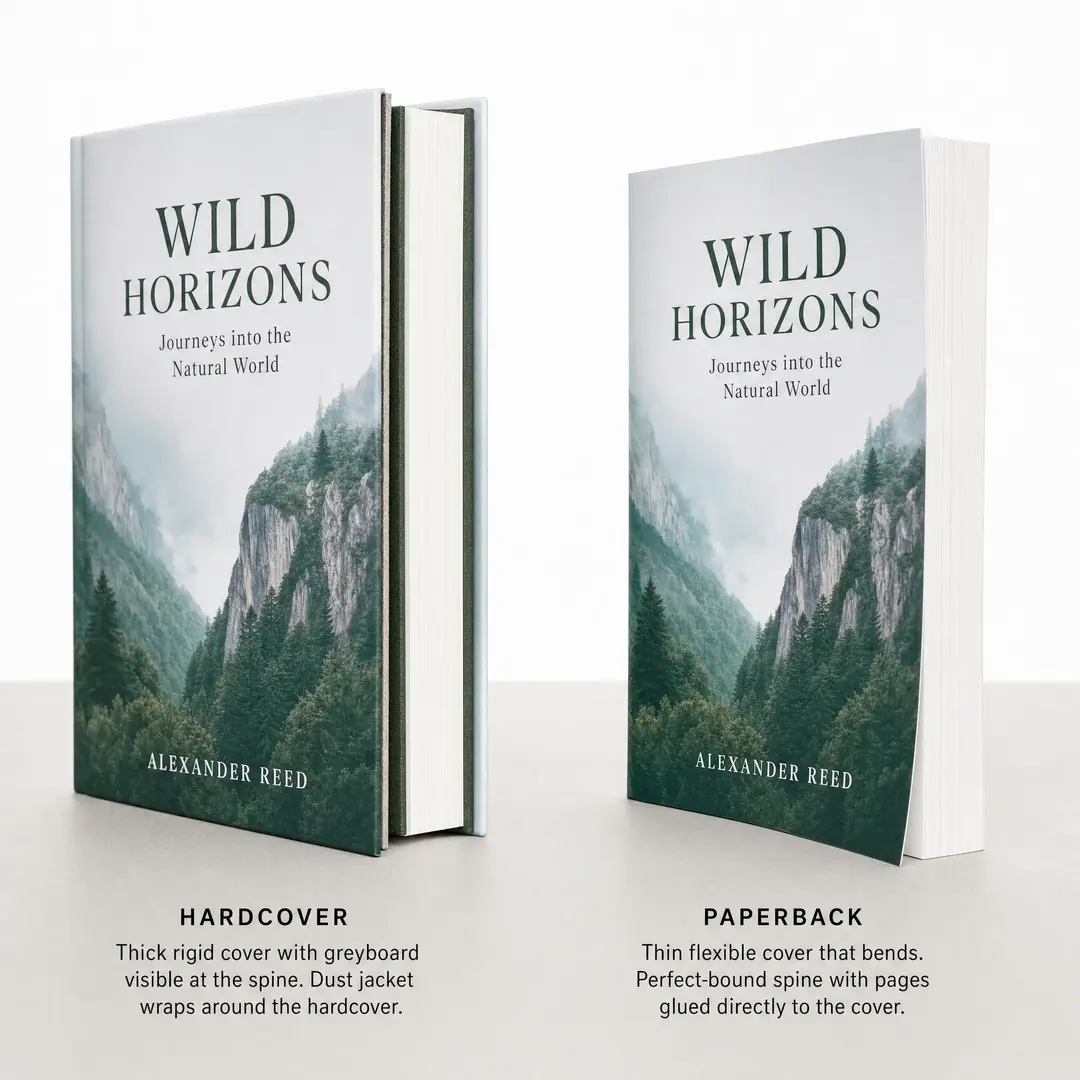
Book Covers and Dust Jackets
Walk through any bookstore and the books that catch your eye probably have UV coating on their covers. It’s not just about shelf appeal — though that matters enormously when your book is competing with hundreds of others face-out on a display table. UV coating also protects the cover through shipping, stocking, browsing, and reading. A well-coated paperback cover can survive dozens of reads without the spine creasing into oblivion or the corners peeling. For hardcover dust jackets, UV coating prevents the scuffing that happens when books slide against each other on shelves.
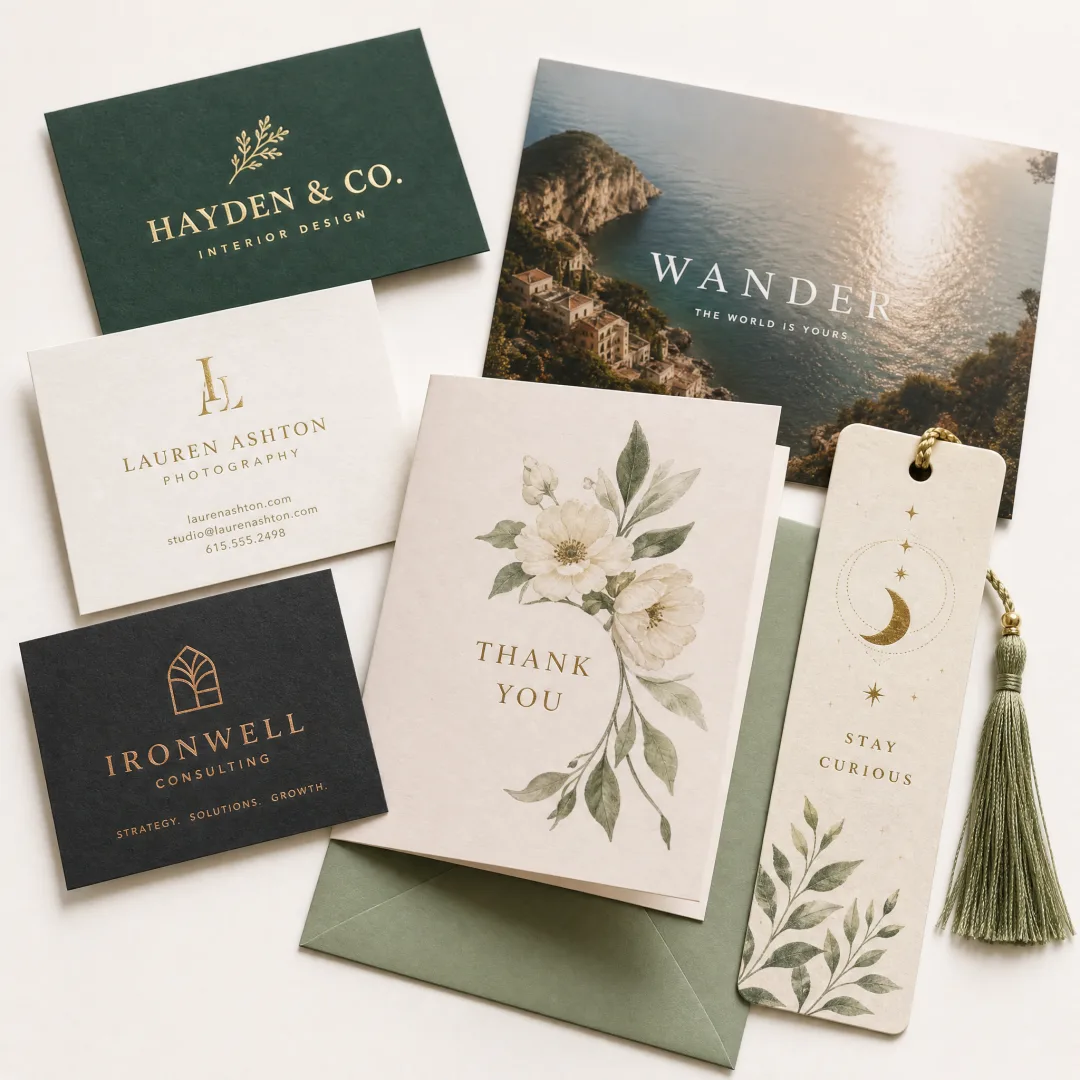
Business Cards That Get Kept
The average business card has about three seconds to make an impression before it goes into a pocket or — let’s be honest — a trash can. Spot UV on a matte card creates something people actually want to keep. They’ll run their thumb over the glossy logo, show it to a colleague, and remember where it came from. I’ve seen companies switch from plain uncoated cards to spot UV cards and report noticeably better follow-up rates from networking events. Correlation isn’t causation, but I don’t think it’s a coincidence either.
Packaging That Sells on Shelf
In retail packaging, you’re fighting for visual attention in a fraction of a second. UV coating — especially spot UV on a matte or soft-touch box — creates instant perceived value. Consumers unconsciously associate that contrast and texture with premium quality. Cosmetic brands have known this for decades; it’s why your moisturizer box feels more expensive than the product inside. Food and beverage packaging is catching on fast, using gloss UV to make product photography look fresh and appetizing.
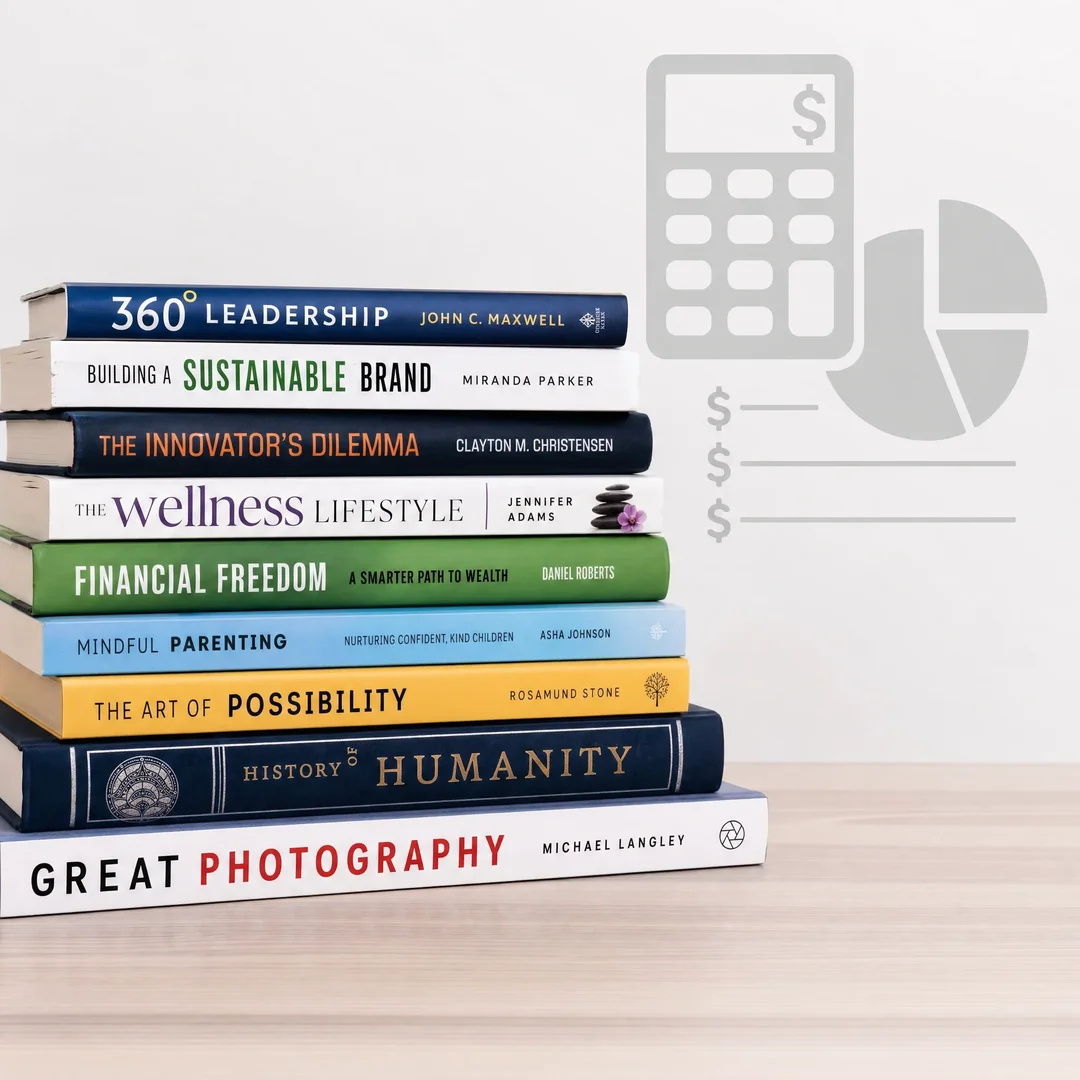
Marketing Collateral Worth Keeping
Brochures, catalogs, and direct mail pieces face a brutal reality: most of them go straight into recycling. UV coating can change that calculus. A catalog with a UV-coated cover feels more substantial — it signals that the contents are worth spending time with. Direct mail postcards with UV coating survive the postal journey intact and arrive looking crisp rather than battered. In an industry where response rates are measured in single-digit percentages, every edge counts.
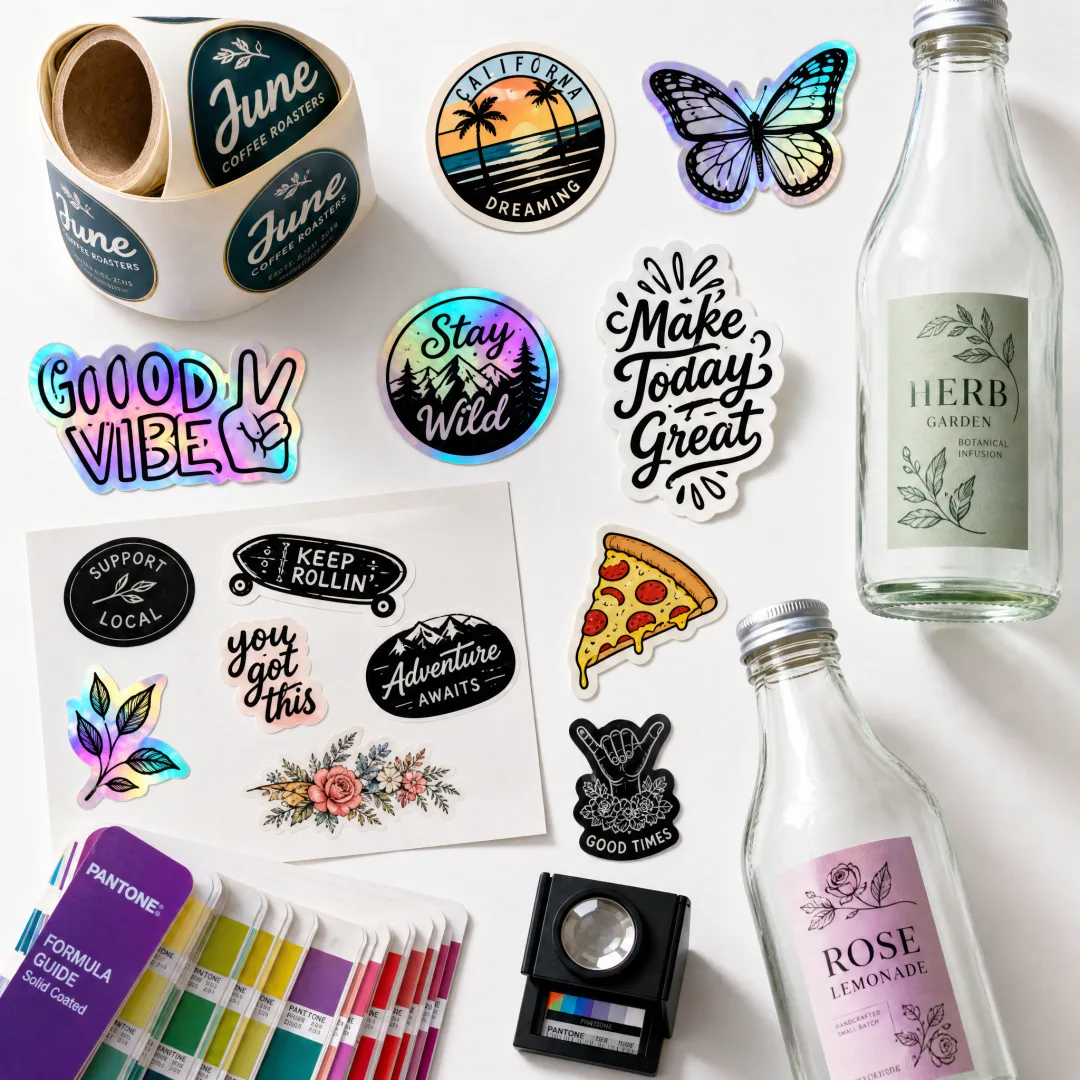
Labels and Stickers
Product labels get handled, rubbed against, exposed to light, and occasionally splashed with whatever the product contains. UV coating on labels provides the durability to survive that abuse while maintaining the visual quality of the printed design. For beverage labels, where condensation is a constant issue, UV coating provides a moisture-resistant barrier that keeps the label looking fresh even when the bottle is sweating.
Calendars and Wall Art
Anything that’s going to hang on a wall for twelve months needs to look good for twelve months. UV coating protects calendar pages from the gradual yellowing and fading that comes from ambient light exposure. It also makes the surface wipeable — useful when your wall calendar lives near the kitchen.
The UV Coating Process — Step by Step
Understanding the production process helps you communicate better with your printer and catch potential issues before they become expensive problems. Here’s how UV coating happens on a commercial press.
Step 1: Surface Preparation
The printed sheets need to be clean, dry, and free of dust or powder residue before coating. Offset printing uses a fine anti-set-off powder to prevent wet sheets from sticking together — that powder has to be removed or it will create a rough, orange-peel texture under the UV coating. Quality printers run sheets through a powder removal system or use inline coating units that apply UV immediately after printing, before powder becomes an issue.
Step 2: Coating Application
The UV liquid is applied through one of several methods: roller coating (most common for flood applications), screen printing (for thick, raised spot UV effects), or digital inkjet-style heads (for variable-data spot UV). The coating thickness is precisely controlled — typically between 3 and 12 microns for standard applications, though raised spot UV can go much thicker. Too thin and you don’t get proper protection or gloss. Too thick and you risk incomplete curing or a brittle finish that cracks.
Temperature and viscosity matter more than you’d think. UV coating that’s too cold won’t flow evenly; too warm and it may penetrate the sheet too deeply, reducing surface gloss. Good press operators monitor both obsessively.
Step 3: UV Curing
This is the critical stage. The coated sheet passes under high-intensity UV lamps — typically mercury vapor or LED-based systems operating at specific wavelength bands. The distance from lamp to sheet, the lamp intensity (measured in watts per square centimeter), and the exposure time all affect the cure quality.
Undercuring is the most common problem at this stage. If the coating doesn’t receive enough UV energy, the polymerization reaction doesn’t complete — you get a surface that feels dry but is actually soft underneath, prone to scratching and yellowing over time. Overcuring can cause brittleness or, on certain substrates, heat damage. The sweet spot is narrow, which is why experienced operators make all the difference.
Modern LED-UV systems are increasingly replacing traditional mercury lamps. They use less energy, produce less heat (reducing the risk of substrate damage), and last longer. The trade-off is that LED systems operate at narrower wavelength bands, so the coating chemistry needs to be formulated specifically for LED cure.
Step 4: Quality Control and Finishing
After curing, sheets are inspected for coating uniformity, adhesion, and proper cure. A simple tape test — pressing tape onto the coated surface and pulling it off — reveals whether the coating has properly bonded to the substrate. If the coating lifts off with the tape, something went wrong in the curing or surface preparation stages.
Once QC clears the sheets, they move to post-press operations: cutting, scoring, folding, and binding. Because UV coating is instantly dry, there’s no waiting between these steps.
File Preparation Tips for UV Coating Projects
I see a lot of file prep mistakes, and most of them are avoidable. Here’s what you need to know before sending artwork for UV coating.
Spot UV Requires a Separate Layer or File
This is the number one mistake. If you want spot UV on specific areas, those areas must be clearly marked in a separate layer (ideally named “Spot UV” or “UV Coating”) and filled with 100% black or a designated spot color. Everything in that layer will receive UV coating; everything not in that layer won’t. If you don’t provide this, your printer has to guess — and guessing is expensive.
Minimum Line Weight and Registration
Spot UV isn’t infinitely precise. Most commercial presses have a registration tolerance of about 0.5mm to 1mm. That means very fine details — hairline strokes, tiny text, intricate patterns — can shift slightly relative to the printed image underneath. A good rule of thumb: keep spot UV elements at least 2 points thick (about 0.7mm) for text and avoid elements smaller than 1.5 points. If your design calls for ultra-precise registration, discuss it with your printer before committing.
Bleed, Safety Margins, and Overprint
Full-bleed UV coating follows the same rules as full-bleed printing: extend the coating area at least 3mm beyond the trim edge. For spot UV that butts up against a trim edge, include bleed on the UV layer. If your spot UV should slightly overlap the printed element it’s highlighting — say a logo — communicate that clearly. A 0.5mm trap (slight overlap) prevents white hairlines from appearing if registration shifts.
File Format and Color Space
Submit your print file as CMYK at 300dpi minimum. The spot UV layer should be a vector mask whenever possible — vector paths give your printer clean, sharp edges even at high magnification. If you must use raster artwork for spot UV, keep it at 600dpi or higher to avoid visible pixelation in the glossy areas. Convert all text to outlines before sending. And for the love of clean files, flatten transparent effects — flattened transparency can cause unexpected results when the UV mask is generated.
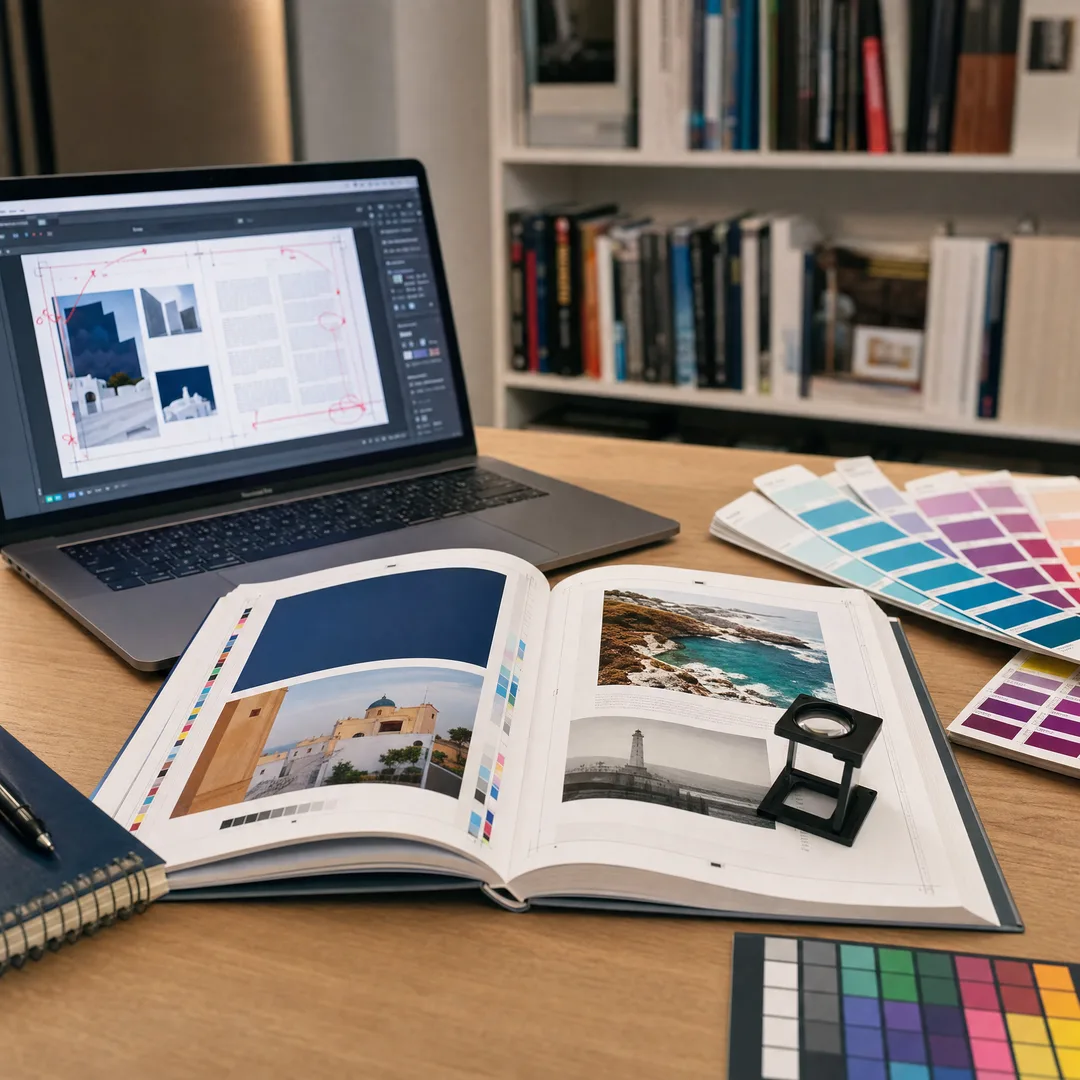
Communicate Clearly With Your Printer
I can’t stress this enough: include a written note or mockup that shows exactly what you want. A PDF with the spot UV layer turned on and off. A marked-up proof with arrows and callouts. A physical sample if you have one. The more context your printer has, the less likely you are to open the box and find something you didn’t expect.
We always encourage clients to send reference images and hop on a quick call before production starts on complex spot UV jobs. Five minutes of conversation can prevent five days of reprints.
Frequently Asked Questions About UV Coating
Does UV coating yellow over time?
Quality UV coatings formulated with UV-stable photoinitiators and resins resist yellowing very well. Cheaper formulations can yellow, especially under prolonged sunlight exposure. If your project will be displayed in direct sunlight — think window posters or outdoor signage — discuss UV-stable formulations with your printer. For typical indoor applications like book covers and business cards, yellowing is rarely a concern with modern coatings.
Can you write on UV-coated surfaces?
Not easily, and not with a regular ballpoint pen. The hard, non-porous surface resists ink adhesion. If you need writability — for example, on the back of a business card or the inside of a greeting card — leave those areas uncoated or use an aqueous coating instead. Some soft-touch UV finishes are slightly more writable than gloss, but “slightly” is the operative word.
Is UV coating waterproof?
No — and this is an important distinction. UV coating is water-resistant, not waterproof. It can handle light condensation, a quick splash, or being wiped with a damp cloth. It won’t survive being submerged or exposed to prolonged moisture. If your project needs true waterproof protection — think outdoor signage, bathroom product labels, or marine applications — lamination is the better choice.
Can UV coating be applied over foil stamping?
Generally no. The UV coating won’t bond properly to metallic foil surfaces and can peel or craze. If you want both foil and UV effects on the same piece, plan to apply the foil after the UV coating, or design them to occupy separate, non-overlapping areas. Always test this combination with your printer before committing to a full production run.
What’s the difference between UV coating and UV varnish?
In practice, these terms are often used interchangeably in commercial printing. Technically, “varnish” sometimes refers to a thinner, less protective application (similar to press varnish), while “coating” implies a fuller protective layer. But in everyday usage, UV coating = UV varnish = UV finish. If you’re specifying a job, just be clear about the look and performance you want rather than getting hung up on terminology.
Does UV coating affect recyclability?
Modern UV coatings are generally compatible with standard paper recycling streams. The coating represents a tiny fraction of the total material and breaks down sufficiently during the repulping process. Check with your printer about their specific coating formulation and recyclability certifications if this is a priority for your brand.
Is UV Coating Right for Your Project?
After all of that, the real question is simple: should you use UV coating on your next project? Here’s my honest framework.
Use UV coating when visual impact is a priority. When the piece will be handled repeatedly and needs to hold up. When you want to create a tactile experience that screens can’t match. When turnaround time is tight and you can’t wait for drying. And especially when you’re competing for attention — on a shelf, in a mailbox, or in someone’s hand at a networking event.
Skip UV coating — or at least have a conversation about alternatives — when the project is heavily text-based and needs to be read under bright lights (glare is real), when it requires multiple folds (cracking risk), when budget is the primary constraint, or when moisture exposure is a genuine concern.
The best printing decisions come from understanding what each finish actually does, not from picking whatever sounds fanciest. Now you know what UV coating does — the chemistry, the types, the process, the trade-offs. The rest is up to your design instincts.
If you’re considering UV coating for an upcoming project — whether it’s book covers, business cards, packaging, or something we haven’t even covered here — the team at EcoPrinting can help you figure out exactly what you need. We offer free consultations where we’ll walk through your project specs and recommend the right finish, no pressure and no hard sell. We can also send you a free sample kit with real UV-coated samples — gloss, matte, and spot UV examples on different paper stocks — so you can see and feel the difference before you commit. Get in touch today and we’ll have samples on their way to you within a few business days.