You probably do not think about varnish when you pick up a book, flip through a brochure, or unbox a product. But someone did. And that decision — a thin, invisible layer of coating — might be the reason you kept reading, the reason the packaging felt premium, or the reason the business card ended up in your wallet instead of the trash.
Varnish is the unsung hero of the printing world. It sits quietly between your design and the reader’s fingertips, shaping everything from how colors pop to how long the piece survives in someone’s hands. Yet most people never give it a second thought — until they hold a print job side-by-side with a competitor’s and realize something feels off.
At EcoPrinting, we have spent years obsessing over this exact layer. Because we know that the right varnish does more than protect — it persuades. It turns a flat page into a tactile experience. It whispers “quality” without saying a word.
In this guide, we will walk you through everything you need to know about varnish in printing: what it is, which types exist, how they compare, when to pick varnish over lamination, and how to prep your artwork so your finish comes out exactly as you imagined. Whether you are a designer preparing files or a brand owner planning your next print run, this is your complete reference.
What Is Varnish in Printing?
Varnish is a liquid coating applied directly to a printed surface during or after the printing process. It seals the ink, adds a layer of protection, and controls the final visual finish — from mirror-like gloss to a soft, no-glare matte.
Think of it as the clear coat on a car. The paint underneath does the heavy lifting, but the clear coat determines the final shine, guards against scratches, and keeps everything looking fresh long after it leaves the factory floor. In printing, varnish plays that same role for ink and paper.
Varnish is not a plastic film. It is a thin, liquid compound — typically oil-based, water-based, or cured with UV light — that dries or cures into a durable, flexible surface. Because it is applied as a liquid, it bonds directly to the printed sheet rather than sitting on top of it like lamination does. This means it preserves the natural texture of the paper underneath while still providing meaningful protection.
The result? Colors stay vibrant longer. Images retain their crispness. And surfaces resist the kind of everyday wear — fingerprints, scuffs, light moisture — that slowly degrades unprotected prints.
Varnish is also remarkably versatile. It can be dialed up to a high-gloss shine for packaging that demands attention on a retail shelf. Or it can be pulled back to a dead-flat matte that makes long-form text a pleasure to read without eye strain. It can even be applied selectively to specific areas — a technique called spot varnish — creating a dimensional contrast between glossy and matte surfaces that draws the eye exactly where you want it.
Types of Varnishing: A Complete Breakdown
Not all varnish is created equal. The type you choose changes everything — the look, the feel, the durability, and even the cost. Here is a deep dive into the five main categories, with honest assessments of where each one shines and where it falls short.
Gloss Varnish
Gloss varnish delivers a high-shine, reflective finish that makes printed colors look deeper and more saturated. It creates a smooth, glass-like surface that catches light and draws attention — which is exactly why it dominates in packaging, business cards, and anything designed to grab eyeballs fast.
When gloss varnish goes down over a printed image, it fills in the microscopic pits and valleys in the paper surface, creating a uniformly smooth plane. Light reflects off this plane evenly, which makes blacks look richer and colors appear more vibrant. It is the same optical principle that makes a wet pebble look more colorful than a dry one.
But gloss has its trade-offs. That reflectivity that makes colors pop also creates glare under direct light, which can make large blocks of text harder to read. For a coffee table book filled with photography, gloss is a dream. For a 300-page novel, it is a migraine waiting to happen.
Best for: business cards, product packaging, high-end marketing brochures, photography books, postcards.
Matte Varnish
Matte varnish does the opposite — it diffuses light rather than reflecting it. The result is a soft, elegant finish with zero glare. Colors appear more subdued and sophisticated. Text becomes effortlessly readable even under bright office lighting or direct sunlight.
Here is something most people do not realize: matte varnish protects just as well as gloss. The protective barrier is functionally the same. What changes is how the surface interacts with light. The microscopic texture of a matte finish scatters incoming light in all directions, eliminating the shiny reflection point. This is why art galleries prefer matte — you see the art, not the overhead track lighting bouncing off the frame.
The one honest caveat: matte varnished surfaces can show light scuff marks more visibly than gloss, especially on dark-colored prints. This is not a durability problem — the varnish is intact — it is a visual one. For high-touch items that will be handled constantly, keep this in mind.
Best for: art prints, photography portfolios, corporate reports, menus, publications where readability matters above all.
Spot Varnish
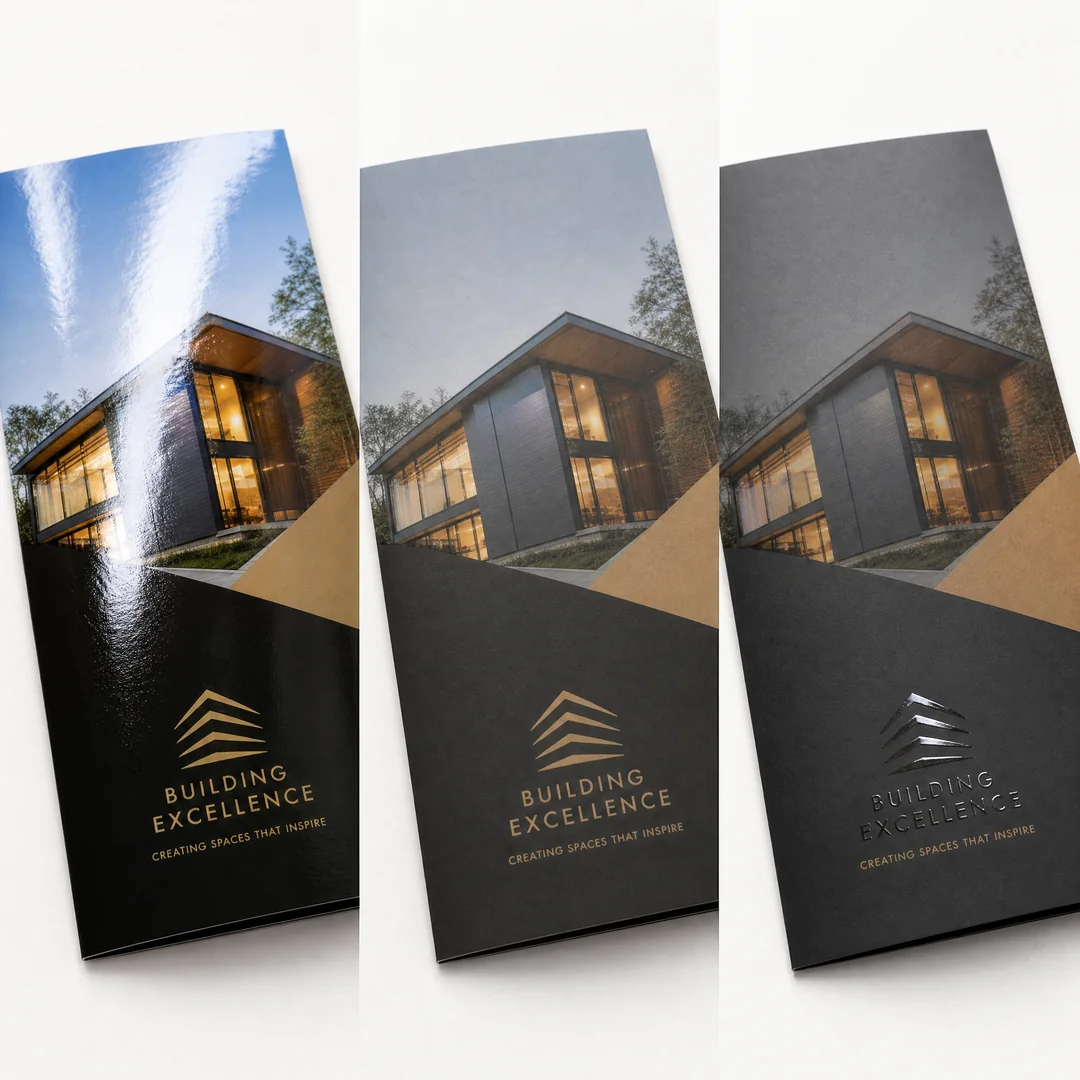
Spot varnish is where things get interesting. Instead of coating the entire sheet, you apply varnish only to specific areas — a logo here, a product image there, a headline that needs to jump off the page. The contrast between the varnished and unvarnished (or differently varnished) areas creates a tactile and visual dimension that flat printing simply cannot achieve.
Imagine a business card with a matte black background. The company logo, rendered in gloss varnish, catches the light as the card tilts in someone’s hand. It is subtle. It is memorable. And it communicates attention to detail before anyone reads a single word.
Spot varnish is often paired with matte lamination or matte varnish as the base, with gloss varnish applied selectively on top. This “matte + gloss spot” combination is one of the most requested premium finishes in commercial printing today. It works brilliantly for book covers, luxury packaging, and any print piece where you want to guide the viewer’s eye to a focal point.
Best for: business cards, book covers, luxury packaging, marketing collateral, any design where selective emphasis creates impact.
Aqueous Varnish
Aqueous varnish is a water-based coating that has gained significant traction in recent years — and for good reason. It is more environmentally friendly than traditional solvent-based varnishes, dries faster on press, and can produce both gloss and matte finishes.
Because aqueous varnish uses water as its carrier rather than petroleum-based solvents, it emits far fewer volatile organic compounds (VOCs) during the drying process. For printers and brands with sustainability targets, this is a meaningful advantage. It also seals the ink effectively without yellowing over time — a common problem with some older varnish formulations.
The trade-off: aqueous varnish does not achieve quite the same extreme gloss level as UV varnish. It sits in a middle ground — good protection, good finish, good value. For high-volume print runs where cost and speed matter, aqueous is often the pragmatic choice.
Best for: high-volume commercial printing, eco-conscious brands, product inserts, catalogs, direct mail.
Flood Varnish
Flood varnish is exactly what it sounds like: varnish applied across the entire surface in one uniform pass. It is less about being a “type” and more about being an application method — a flood coat can be gloss, matte, or aqueous, depending on what the job needs.
The point of flood varnishing is consistency and efficiency. When every square inch of the sheet needs the same protective treatment — think packaging boxes, retail labels, or product inserts that will be handled repeatedly — flood varnish delivers a predictable result at scale.
Best for: packaging, labels, product inserts, any print job where uniform coverage is the goal.
Benefits of Varnishing: More Than Just a Pretty Surface
If varnish only made things shiny, it would not be worth the extra step. The real value is cumulative — protection, perception, and performance working together. Here is what varnish actually does for your printed piece.
Protection Against Handling and Wear
Printed materials get touched. A lot. Business cards slide in and out of wallets. Brochures get passed around conference rooms. Book covers endure years of being pulled off shelves. Every one of those interactions creates micro-abrasion — tiny scratches and scuffs that gradually dull the surface.
Varnish creates a sacrificial layer that absorbs this wear. The ink underneath stays intact. Studies show that varnished prints retain their visual quality significantly longer than uncoated equivalents, especially in high-traffic commercial environments where printed collateral sees daily handling.
Moisture and UV Resistance
Paper and moisture are not friends. Even ambient humidity can cause ink to bleed, paper to warp, and colors to shift. Varnish acts as a moisture barrier, sealing the printed surface against humidity and incidental water contact — a spilled drink on a restaurant menu, for example.
UV resistance is equally important. Ultraviolet light breaks down ink pigments over time, causing fading and discoloration. While varnish is not a substitute for dedicated UV coatings, it does provide a meaningful first line of defense, slowing the degradation process and keeping prints looking fresh for longer.
Enhanced Visual Impact
This is the obvious one, but it deserves to be stated clearly. Varnish makes print look better. A gloss-finished photo has depth that an uncoated print lacks. A spot-varnished logo seems to float above the page. A matte-varnished art print feels like a gallery piece.
The human eye is drawn to contrast and dimension. Varnish creates both — even when the effect is subtle enough that the viewer cannot consciously identify what makes the piece feel premium.
Tactile Experience
Print is physical. That is its superpower over digital media. And varnish amplifies that superpower by adding texture to the equation.
A spot-varnished area feels different under the fingertip than the surrounding surface. The brain registers this without conscious effort. It is the same principle behind why people touch product packaging before deciding to buy — tactile input drives emotional response. Varnish turns a passive viewing experience into an active, multi-sensory one.
Improved Perceived Value
Multiple consumer studies have confirmed what printers have known for decades: people associate coated, finished surfaces with higher quality. A varnished business card signals professionalism. A varnished product box suggests premium contents. The finish communicates before the content does.
For brands, this is a direct competitive lever. When your brochure sits next to a competitor’s on a trade show table, the varnished one gets picked up first. Every time.
How Varnish Is Applied: The Production Process
Understanding how varnish goes from liquid to finished surface helps you make smarter decisions — and avoid costly surprises. Here is the step-by-step workflow, from press to final inspection.
Step 1: Surface Preparation
Before any varnish touches the sheet, the printed surface must be clean and contaminant-free. Dust, powder from the printing process, or residual oils from handling can cause adhesion problems — the varnish will not bond evenly, and the result is a patchy, inconsistent finish.
Professional print shops run printed sheets through cleaning units or use anti-static systems to remove debris. This step is invisible in the final product but absolutely critical to the result.
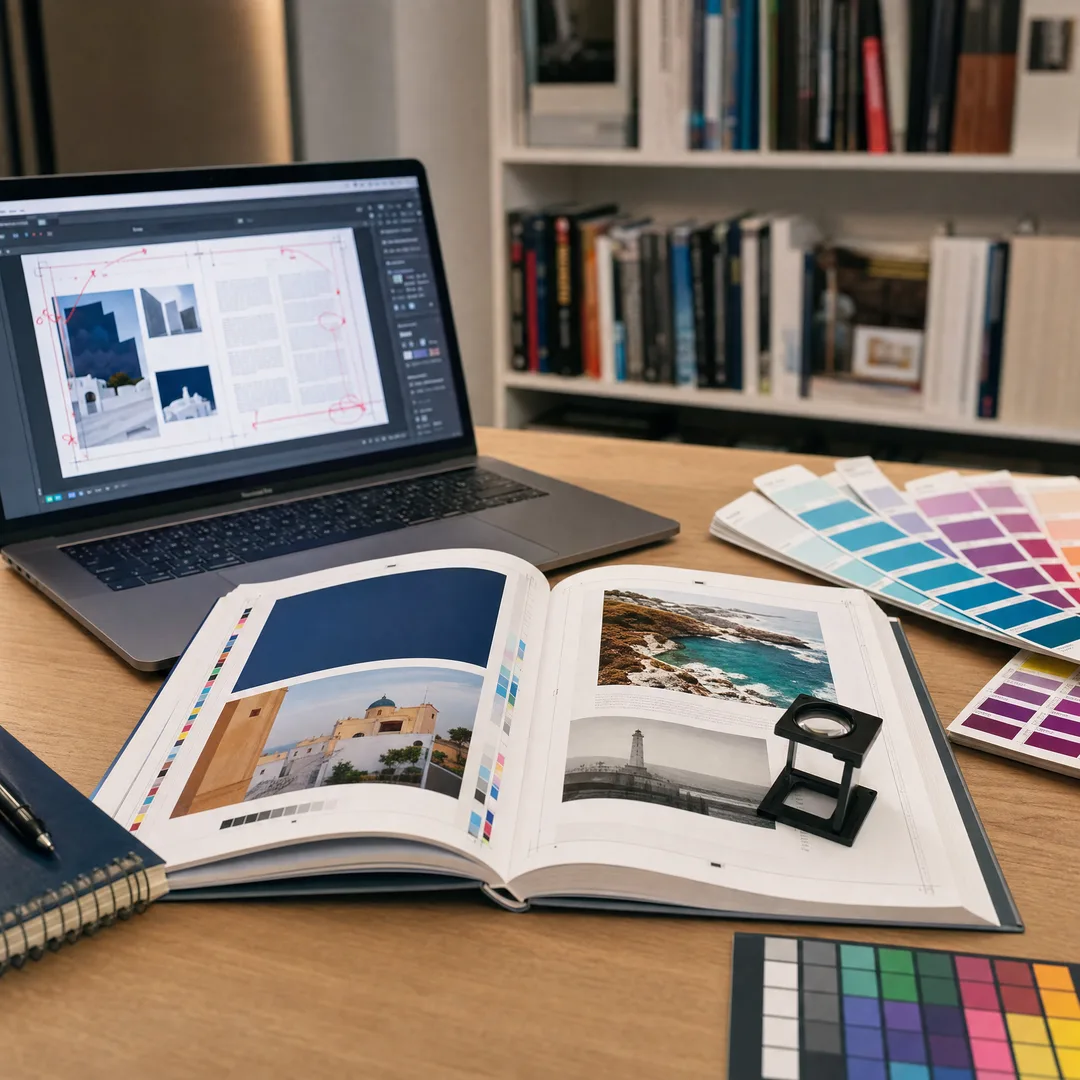
Step 2: Varnish Selection and Mixing
The varnish type — gloss, matte, or aqueous — is selected based on the desired finish, the substrate material, and how the printed piece will be used. Viscosity is adjusted for the specific press and paper stock. Too thick, and the varnish sits heavy on the surface. Too thin, and coverage is weak.
For spot varnish jobs, a separate plate is created that defines exactly which areas receive coating. This plate is registered to the print artwork so the varnish lands precisely where intended — on a logo, not two millimeters to the left of it.
Step 3: Application
Varnish is applied through a dedicated coating unit on the printing press. For offset printing, this is typically the last unit in the press line — the sheet travels through the ink units first, then through the coating unit where varnish is applied as a final pass.
The application method varies by varnish type. Aqueous varnishes are often applied with anilox roller systems that meter a precise amount of coating. UV varnishes use similar application methods but pass immediately under ultraviolet lamps that cure the coating in fractions of a second.
Step 4: Drying and Curing
Different varnishes cure differently. Oil-based varnishes dry through oxidation — they absorb oxygen from the air and harden over hours. Aqueous varnishes dry through evaporation — the water carrier evaporates, leaving the solid coating behind. UV varnishes cure instantly under ultraviolet light through a photochemical reaction.
Curing time affects production scheduling. A job with oil-based varnish needs time to dry before it can be trimmed, folded, or packed. A UV-cured job can move straight to finishing. For tight deadlines, this difference matters.
Step 5: Quality Control
Once cured, every job undergoes inspection. Technicians check for consistent coverage, proper adhesion, correct gloss or matte level, and accurate registration (for spot varnish). Samples are flexed to test for cracking. Surfaces are rubbed to test for scuff resistance.
At EcoPrinting, we run these checks on every single job — not spot-checks, not random sampling. Because a varnish defect is the kind of thing your customer notices before you do, and by then it is too late.
Common Applications: Where Varnish Makes the Difference
Varnish is everywhere once you start looking. Here are the major application areas, with notes on which finish type typically works best for each.
Packaging and Boxes
Product packaging lives a hard life. It gets stacked, shipped, handled by warehouse staff, stocked on shelves, and examined by customers. A varnish finish — usually gloss for retail impact or matte for premium positioning — protects the printed graphics through every stage of that journey.
For consumer goods packaging, gloss varnish remains the dominant choice because it maximizes shelf appeal under retail lighting. For luxury goods, matte finishes with spot gloss accents signal sophistication without shouting.
Business Cards
A business card has roughly three seconds to make an impression. Varnish dramatically improves those odds. A spot-gloss logo on a matte background is tactile and memorable. A full gloss card feels substantial and polished.
Business cards also endure more handling than almost any other printed piece — wallets, pockets, desk drawers, card holders. Varnish preserves the print quality through all of it.
Art Prints and Photography Books
In fine art and photography, the finish must enhance without interfering. Matte varnish is the standard here — it eliminates glare so the viewer sees the image, not the reflection of the room. For gallery-quality prints, a matte or satin varnish preserves color accuracy while providing archival-level protection.
Coffee Table Books and High-End Publications
These are the print jobs where varnish strategy becomes an art form in itself. A coffee table book might use matte varnish across most pages for readability, with spot gloss varnish on full-page photographs to make them leap off the spread. The interplay between finishes becomes part of the reading experience.
Marketing Collateral
Brochures, flyers, catalogs, and direct mail pieces all benefit from varnish. Aqueous varnish is particularly popular in this category because it balances cost, speed, and quality for the high volumes typical of marketing campaigns.
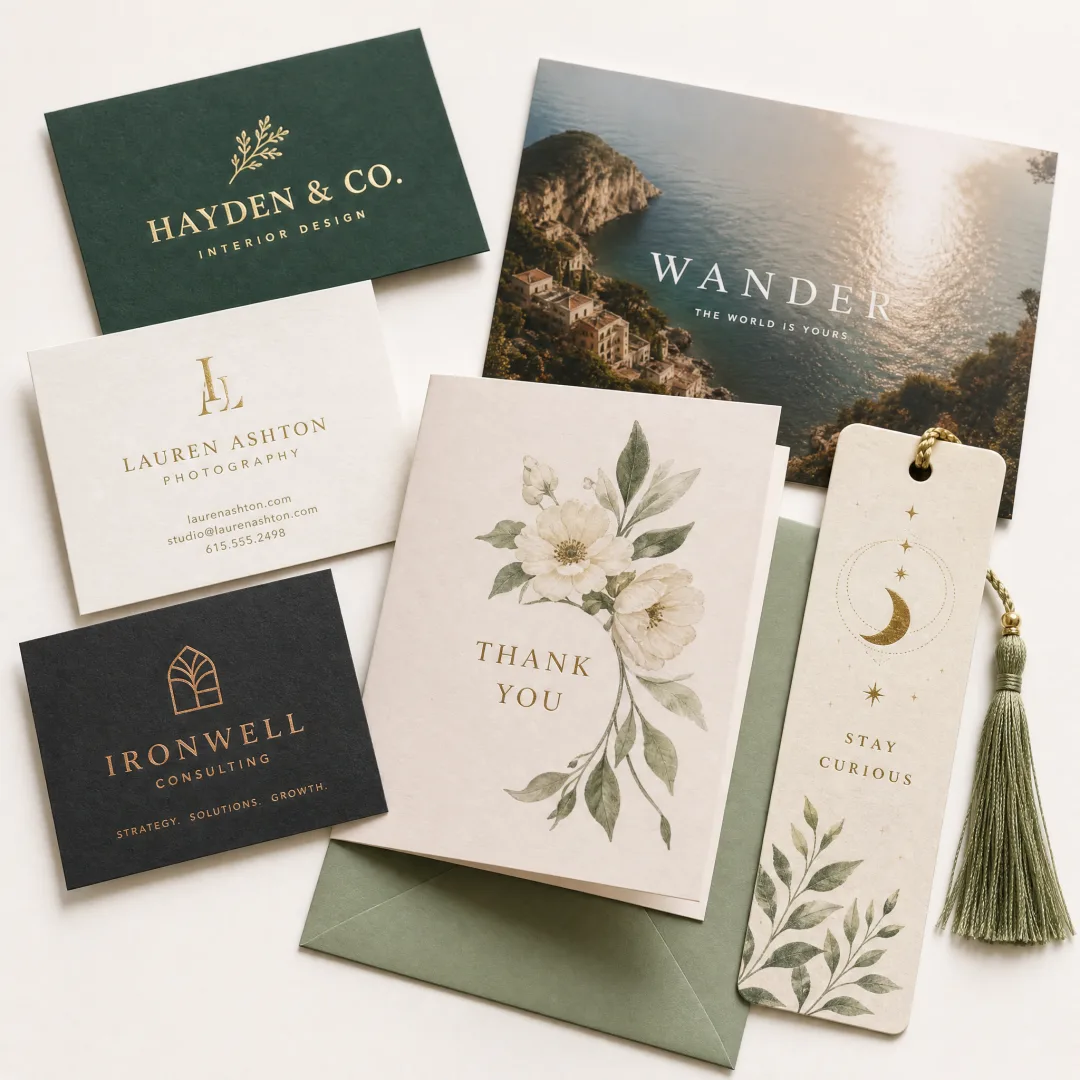
Greeting Cards and Invitations
Special occasion stationery is all about perceived value. A wedding invitation with spot varnish on the couple’s names, set against a soft matte background, feels bespoke and considered. The finish communicates the importance of the occasion before the guest reads a single word.
Posters and Signage
Posters need to grab attention from across a room. Gloss varnish amplifies color saturation for maximum visual punch. For posters displayed behind glass or in brightly lit environments, matte varnish prevents the glare that makes viewing uncomfortable.
Card Decks and Game Components
Playing cards and board game components are touched constantly. They need finish durability above all else. Aqueous or UV varnish provides the abrasion resistance needed for cards to slide smoothly and maintain their print quality through hundreds of shuffles.
Varnish vs. Lamination: How to Choose the Right Finish
This is the question we hear most often from first-time print buyers: should I use varnish or lamination? The answer depends on what you are protecting, how it will be used, and what you want it to feel like. Here is the honest breakdown.
What They Are
Varnish is a liquid coating applied directly to the printed surface. It bonds with the paper and becomes part of it. Lamination is a thin plastic film — typically polypropylene or polyester — that is heat-sealed or pressure-bonded over the entire printed sheet. It sits on top as a separate physical layer.
Protection Level
Lamination wins on raw durability. A laminated surface is significantly more resistant to tearing, moisture, and heavy abrasion. If your printed piece will be exposed to rain, frequent cleaning, or rough handling — think restaurant menus, outdoor signage, or industrial labels — lamination is the safer bet.
Varnish provides meaningful protection, but it is a thinner barrier. It guards against scuffs, fingerprints, and light moisture. For most indoor commercial applications — business cards, brochures, book interiors — this is more than enough.
Look and Feel
This is where varnish often wins. Because varnish bonds into the paper rather than sitting on top of it, it preserves the natural texture and flexibility of the stock. A varnished brochure still feels like paper. A laminated brochure feels like plastic.
For applications where tactile quality matters — art books, luxury packaging, premium stationery — varnish delivers a more sophisticated hand feel. Lamination, even in its soft-touch variants, cannot fully replicate this.
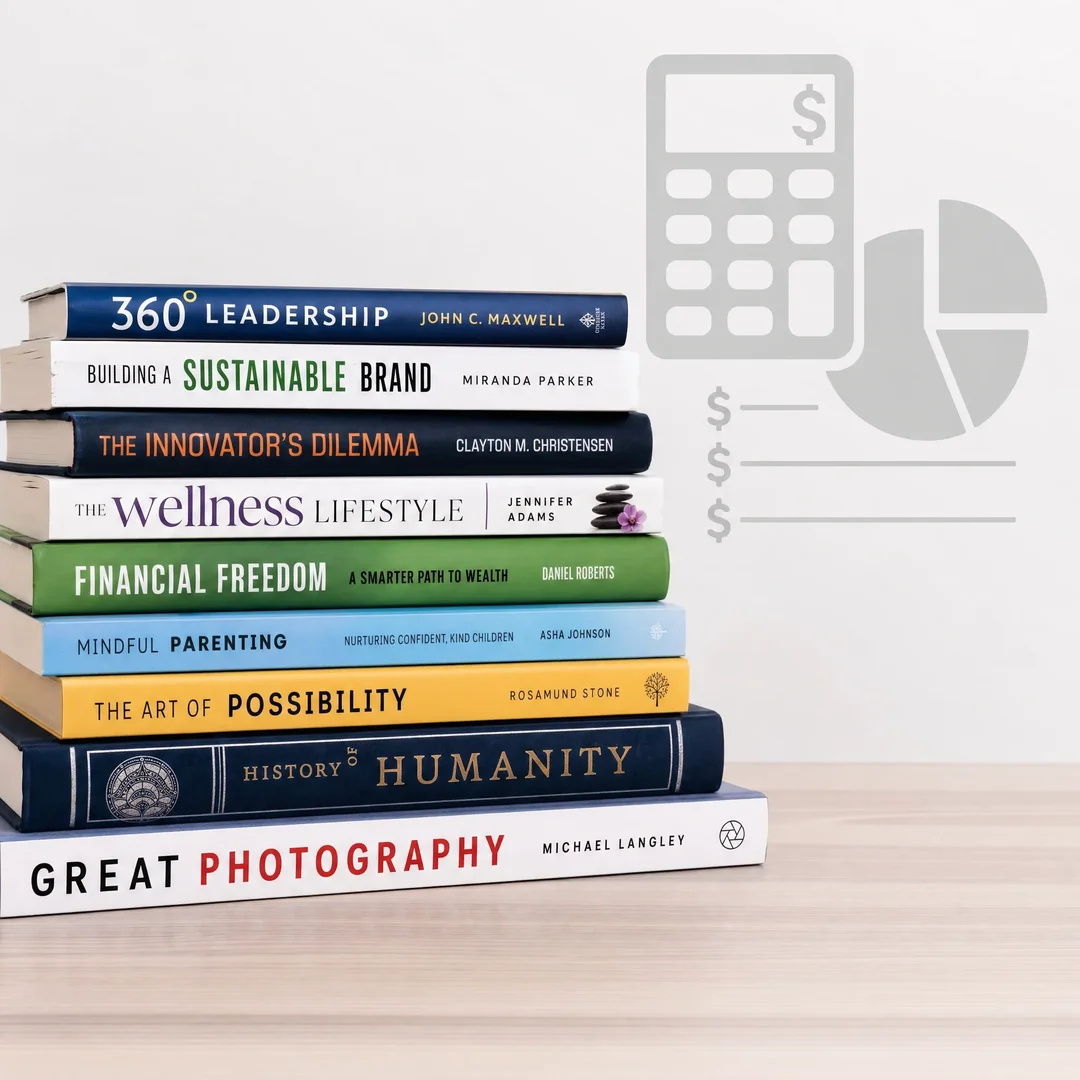
Cost and Production
Varnish is generally less expensive than lamination, both in material cost and in production time. It can be applied inline on the printing press, whereas lamination is a separate off-press process that adds time and cost to the job.
However, for extremely high-volume runs, the cost difference narrows. And for jobs that absolutely require maximum durability, the lamination premium pays for itself in reduced returns and replacements.
Environmental Considerations
Varnish — especially aqueous varnish — has a lighter environmental footprint than lamination. Laminated paper is difficult to recycle because the plastic film must be separated from the paper fiber, a process that most recycling facilities are not equipped to handle. Varnished paper, by contrast, can enter standard recycling streams without issue.
For brands with sustainability commitments, this factor alone often tips the decision toward varnish.
Decision Quick-Reference
Choose varnish when: you want a natural paper feel, the piece is for indoor use, sustainability matters, budget is a consideration, or you need inline production speed.
Choose lamination when: the piece will face moisture or heavy wear, you need maximum tear resistance, the item needs to be wiped clean (menus, medical labels), or extreme durability is non-negotiable.
How to Prepare Your Artwork Files for Varnishing
Spot varnish is only as precise as the file that defines it. A poorly prepared varnish layer leads to misregistration — varnish that lands slightly off-target, blurring the effect and looking sloppy. Here is how to get it right the first time.
Create a Dedicated Varnish Layer
In your design file (Adobe InDesign, Illustrator, or Photoshop), create a separate layer specifically for varnish. Label it clearly — “GLOSS SPOT VARNISH” or “MATTE SPOT VARNISH” — so there is zero ambiguity when the file reaches prepress.
Everything on this layer should be solid black (100% K) — no gradients, no tints, no transparent elements. The varnish plate is a binary mask: varnish or no varnish. Halftones and gradients in the varnish layer produce unpredictable results.
Define Varnish Areas Precisely
Use vector shapes — not raster images — to define your varnish areas. Vector paths produce clean, sharp edges. Raster-based masks can introduce anti-aliasing artifacts that show up as fuzzy varnish edges on press.
For fine details like small text or thin lines being spot-varnished, add a slight trap (0.1–0.2 mm) to account for minor press registration shifts. This ensures the varnish fully covers the intended area even with normal production tolerances.
Specify Your Varnish Type Clearly
Do not assume the printer will know what finish you want. Include a written specification alongside the file: “Gloss spot varnish on areas indicated in varnish layer” or “Flood matte aqueous varnish, full coverage.”
If your job combines multiple varnish types — for example, a flood matte base with gloss spot accents — specify the application order. This matters because the sequence affects the final appearance.
Use the Right File Format
PDF/X-4 is the current industry standard for print-ready files with varnish layers. It preserves spot color channels, supports transparency, and is widely accepted by commercial printers. EPS and native AI files also work, but PDF is the safest universal option.
When exporting, make sure “Spot Colors” is enabled in your export settings. If your varnish layer uses a spot color swatch, it must be preserved in the output file.
Preflight Before Sending
Run a preflight check on your file before submitting it. Verify that:
The varnish layer contains only 100% K elements (no other colors, no images)
Overprint settings are correct (varnish should usually be set to overprint)
There are no unintended objects on the varnish layer
The varnish layer is turned on (not hidden) in the exported file
Trim and bleed specifications match the job requirements
When in doubt, send a labeled proof alongside the production file — a visual reference that shows exactly where varnish should appear. Printers appreciate this. It eliminates guesswork.
Why Choose EcoPrinting for Your Varnishing Needs?
Varnish is one of those things where experience makes all the difference. Anyone can run coating through a press. But dialing in the right viscosity for the right paper stock, at the right coverage weight, with the right curing time — that takes years of doing it every day.
At EcoPrinting, varnishing is not an afterthought bolted onto our production line. It is a core capability we have invested in deeply. Our coating systems are calibrated for precision across every finish type: gloss, matte, spot, aqueous, and UV. We match the varnish to the paper — because a coating that looks flawless on coated stock can behave completely differently on uncoated stock, and we know the difference.
We also believe you should not have to commit to a full production run without knowing exactly what the finish will look like. That is why we offer free printed samples — real, physical samples produced on our equipment, not generic swatches from a catalog. You can see the gloss level, feel the texture, and compare finishes before a single production sheet runs. If you are unsure whether matte or gloss is right for your project, we will send you both so you can hold them side by side and decide.
Beyond samples, we offer a free 1-on-1 consultation with a print specialist who can walk through your project requirements, review your artwork files for varnish compatibility, and recommend the finish strategy that fits your budget and timeline. No pressure, no sales pitch — just practical advice from people who do this every day.
Whether you are printing 500 business cards or 50,000 product boxes, the varnish finish will define how your brand is perceived. Do not leave it to chance. Reach out to EcoPrinting today, request your free samples, and let us help you get the finish right — the first time.
Frequently Asked Questions
Can varnish be applied to both sides of a printed sheet?
Yes. Varnish can be applied to one side or both sides, depending on the job requirements and press configuration. For book covers and packaging, single-sided varnish is common. For items like postcards or menus that will be handled from both sides, double-sided varnish provides complete protection.
Does varnish change the color of printed images?
Varnish does not alter the ink colors themselves, but it does change how light interacts with the surface — which changes how colors are perceived. Gloss varnish increases perceived saturation and contrast. Matte varnish slightly softens colors and reduces contrast. This is a perceptual effect, not a chemical one. The actual ink values remain unchanged.
How long does varnish last?
When properly applied and cured, varnish remains stable for years. Oil-based varnishes can yellow slightly over very long periods (decades), but modern water-based and UV formulations are far more stable and resist yellowing. For archival purposes, aqueous and UV varnishes are preferred.
Can I write on a varnished surface?
It depends on the varnish type and the writing instrument. Gloss and UV varnishes create a slick surface that ballpoint pens struggle with. Matte varnish is more receptive to writing. If a printed piece needs to be written on — like a notepad cover or a form — specify this to your printer so they can select an appropriate finish or leave writing areas unvarnished.
Is varnish environmentally friendly?
Aqueous (water-based) varnishes are the most environmentally friendly option. They emit low VOCs, are non-toxic once cured, and do not interfere with paper recycling. Even oil-based varnishes are far less environmentally impactful than plastic lamination. For eco-conscious brands, aqueous varnish is the recommended choice.
What is the difference between varnish and UV coating?
UV coating is a specific type of varnish that cures instantly under ultraviolet light rather than drying through evaporation or oxidation. It can achieve a higher gloss level than conventional varnishes and provides excellent abrasion resistance. The trade-off is higher cost and a more pronounced plastic-like feel. UV is often used for high-impact commercial applications like trading cards, point-of-sale displays, and premium packaging.
Get the Finish Your Print Job Deserves
Varnish might be invisible, but its impact is anything but. The right finish protects your investment, elevates your brand perception, and turns a printed piece from ordinary into memorable. The wrong finish — or worse, no finish at all — leaves your work vulnerable to wear and visual mediocrity.
At EcoPrinting, we have helped hundreds of brands, designers, and publishers get their varnish finish exactly right. From single-run spot varnish business cards to full-scale packaging projects with multi-finish specifications, our team brings the same level of care to every job that comes through our doors.
Ready to see the difference varnish makes? Request your free printed samples today and schedule a free 1-on-1 consultation with our print specialists. We will review your project, recommend the optimal finish, and provide a detailed quote — all with zero obligation. Contact EcoPrinting and let us help you put your best finish forward.