You Have a Stack of Ideas. Here’s How to Turn Them Into Something People Can Hold.
Maybe you run a tiny poetry press out of your bedroom. Maybe your community garden puts together a seasonal roundup of planting tips and member stories. Or maybe your small business sends a quarterly print newsletter to clients who are tired of inbox clutter. Whatever the reason, you want something physical—something people can flip through, dog-ear, leave on a coffee table. And you’ve probably already noticed that printing locally costs more than you expected, especially when you only need 100 or 200 copies.
That’s where China comes in. Not in some vague “everything is cheaper there” way, but because China’s print industry has spent the last decade building exactly the kind of small-batch, short-turnaround capacity that indie creators, community groups, and lean businesses need. You can print 50 saddle-stitched zines with uncoated interiors and a cardstock cover for a fraction of what a local shop would quote. You can run 300 newsletters on glossy A4 and have them folded, addressed, and shipped directly to your mailing list. This isn’t a theory—it’s how thousands of zine makers and small publishers already operate.
This guide walks through everything that matters: zine culture and specs, newsletter formats, paper choices, binding methods, the digital-vs-offset decision, proofing, and real cost logic. By the end, you’ll know exactly what to ask for—and whether printing from China makes sense for your project.
Zines: A Quick Tour of the Format That Refuses to Die
What a Zine Actually Is (and Isn’t)
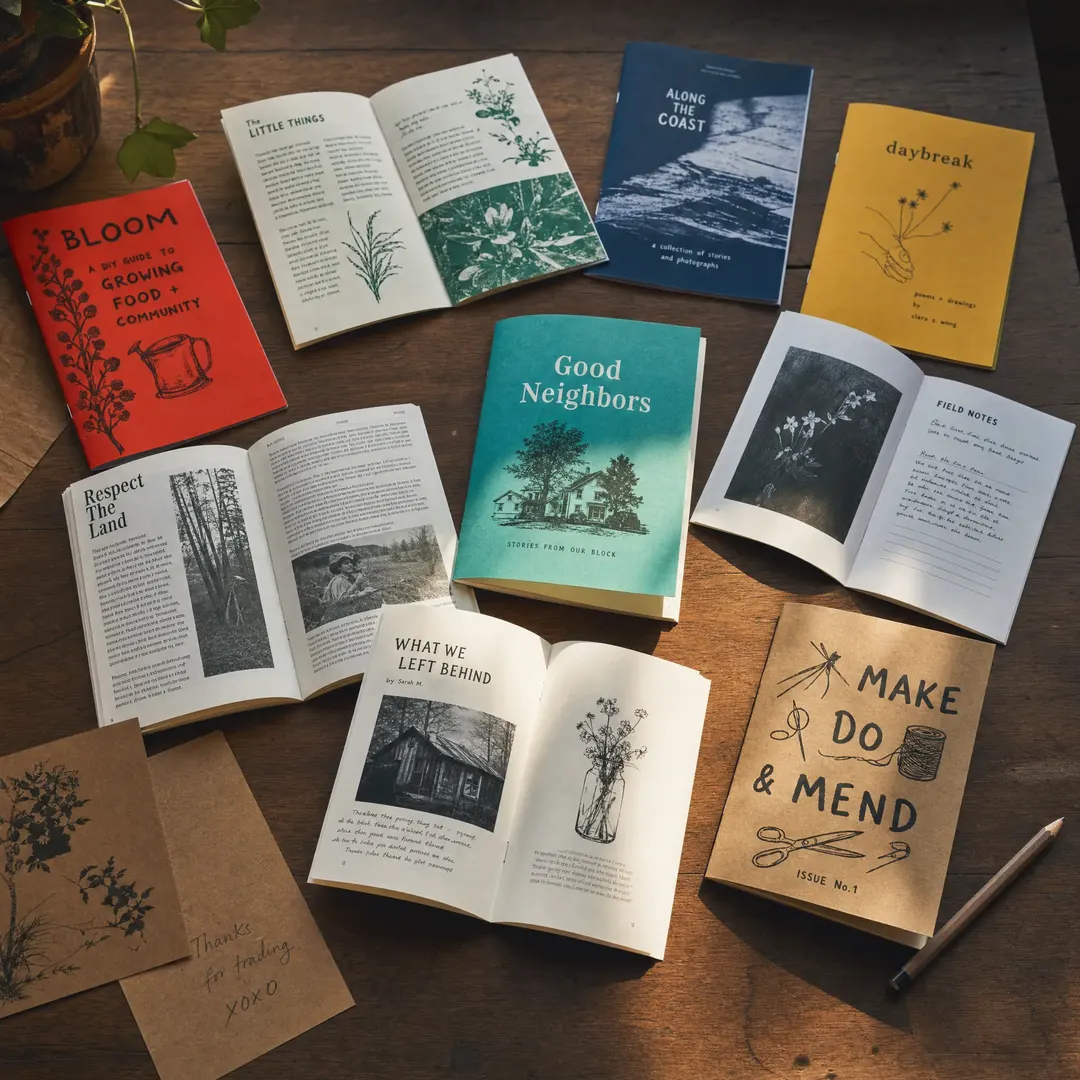
A zine (pronounced “zeen,” short for magazine or fanzine) is a self-published, small-circulation booklet made outside mainstream publishing channels. There’s no board of editors. No ISBN. Often no profit motive at all. What zines share is a DIY ethic—the idea that anyone with something to say can staple some folded sheets together and put it into the world. The format traces back to 1930s science fiction fanzines, blew up again through 1970s punk and riot grrrl scenes, and today lives on in art zines, perzines (personal zines), photo zines, poetry chapbooks, comic zines, and activist pamphlets distributed at zine fests from Portland to Melbourne.
The community around zines is remarkably durable. Zine fests draw hundreds of makers and thousands of attendees. Independent bookstores and museum shops increasingly stock them. University libraries archive them. This isn’t a dying fringe hobby—it’s a parallel publishing ecosystem that keeps growing precisely because it’s personal, tactile, and unmediated.
Common Zine Sizes and Why They Matter
If you flip through a zine distro or browse a fest table, you’ll notice that most zines cluster around a handful of sizes. That’s not an accident—these dimensions evolved because they’re easy to produce, cheap to print, and comfortable to hold.
A5 (148 × 210 mm) is the workhorse. Fold an A4 sheet in half and you get A5. It feels substantial without being bulky, fits in a tote bag, and works beautifully for everything from photo zines to essay collections. If you’re printing your first zine and don’t know what size to pick, start here.
A6 (105 × 148 mm) is the pocket format. Tiny, intimate, quick to read. Great for poetry, mini-comics, or a short manifesto you want people to carry around. The small page forces you to be concise—every word and image has to earn its space.
Digest (5.5 × 8.5 inches) is the North American default. If your audience skews US-based, this half-letter size feels instantly familiar. It’s the format of literary journals, indie magazines, and countless zines sold through US distros.
Half-Letter (5.5 × 8.5 inches) and Quarter-Letter (4.25 × 5.5 inches) round out the common options. Quarter-letter in particular has a charming, almost handmade quality—it’s what you get when you fold a standard letter sheet twice.
For page counts, zines typically run 8 to 64 pages—short enough to read in one sitting, long enough to feel like a real object. Anything beyond 64 pages starts to push against what saddle stitching can handle cleanly (more on that below).
Self-Cover vs. Separate Cover: The Zine Maker’s First Decision
When you’re pricing out a zine, one of the earliest choices is whether your cover will use the same paper as the interior pages (self-cover) or a heavier, separate stock. A self-cover zine—say, 24 pages of 100 gsm uncoated paper, stapled twice through the spine—costs less, feels more DIY, and has a cohesive, understated look. It’s the classic zine aesthetic: modest, honest, no frills.
A separate cover means your interior stays on lighter paper (maybe 80–100 gsm uncoated) while the cover switches to something heavier—typically 200–250 gsm cardstock, maybe with a soft-touch matte lamination or a spot of color that contrasts with a black-and-white interior. This elevates the object. It says “this isn’t just photocopied in someone’s garage,” even if the content still carries that raw zine energy. A cardstock cover also protects the inner pages better during shipping and handling—something worth considering if you’re mailing copies internationally.
Newsletters: When Your Organization Needs to Land in Mailboxes
The Printed Newsletter Isn’t Dead—It Just Got Smarter
Email open rates hover around 20–25% on a good day. A printed newsletter, by contrast, sits on someone’s kitchen counter for a week. They glance at it while making coffee. Their partner picks it up. A neighbor spots it during a visit. The physical presence of print creates a completely different engagement dynamic—one that non-profits, membership associations, churches, cultural centers, and small businesses have been quietly rediscovering.
A printed newsletter also telegraphs legitimacy. When a community land trust sends a quarterly print update to its members, it communicates permanence and care in a way that a Mailchimp blast simply doesn’t. The same goes for a language school sharing course schedules and student stories, or a cycling club rounding up route reports and gear tips.
Standard Newsletter Formats and Mailing Considerations
Newsletter printing generally revolves around two international standards: A4 (210 × 297 mm) for metric markets and Letter (8.5 × 11 inches) for North America. Most newsletters are 2 to 8 pages—enough to convey substantial information without becoming a magazine.
The simplest format is a single-sheet, double-sided print —one A4 or Letter sheet, printed on both sides, folded in half or thirds for mailing. This is the lowest-cost option, and it works surprisingly well for monthly updates, event calendars, or donor reports where the content is concise and visual.
For richer content, a 4-page or 8-page saddle-stitched newsletter gives you a proper booklet feel without the budget jump to perfect binding. An 8-page newsletter is literally two sheets of paper, folded and stapled. It’s lightweight, mails at letter rates in most postal systems, and handles photos and illustrations well.
Folding matters for mailing. A trifold (letter fold) turns an A4 sheet into a DL-sized self-mailer that fits standard business envelopes. A half-fold creates an A5-sized piece that works for thicker stocks. If you’re mailing without an envelope (self-mailer), your printer needs to know this upfront—tab seals or wafer seals may be required to keep the piece closed during postal processing, and address panel placement needs to follow postal guidelines for the destination country.
Glossy, Silk, or Uncoated: Choosing Paper for Newsletters
Unlike zines—where uncoated paper is practically a religious conviction—newsletters have more flexibility. A silk or matte coated paper (usually 128–157 gsm) gives photographs a crisp, vibrant look without the fingerprint-magnet shininess of full gloss. This is the paper you’d pick for a cultural center’s seasonal program guide full of event photos, or a conservation charity’s donor update with landscape imagery.
Glossy coated paper (128–157 gsm) maximizes color saturation. If your newsletter is image-heavy—think a travel club’s destination feature or a design studio’s portfolio mailer—gloss delivers impact. The trade-off is that glossy paper can feel a little corporate for community-oriented content, so weigh the vibe against the visuals.
Uncoated paper works for newsletters too, especially when the brand positioning is warm, approachable, or environmentally conscious. A local food co-op’s newsletter on uncoated stock with earthy two-color printing feels authentic in a way that glossy paper never would. Uncoated also takes inkjet addressing well if you’re personalizing each copy before mailing.
Binding and Paper: The Two Decisions That Define the Object
Saddle Stitching: The Small-Run Workhorse
Saddle stitching—also called staple binding or wire stitching—is the binding method you’ve seen on countless booklets, zines, brochures, and thin magazines. Sheets are folded in half, gathered together (one folded sheet nested inside the next), and then two or more wire staples are driven through the fold line from the outside to the center spread.
The key constraint: your total page count must be divisible by 4. Each folded sheet creates 4 pages (2 on each side). So a 12-page zine uses 3 sheets; a 24-page zine uses 6. If your content doesn’t hit a multiple of 4, you’ll need to add blank pages or cut content. The practical limit for saddle stitching sits around 64 pages with standard paper weights—beyond that, the spine gets too bulky, the pages don’t lie flat, and “page creep” (where inner pages extend past outer pages when folded) becomes visually distracting.
Why is saddle stitching ideal for zines and newsletters? Three reasons. First, it’s fast—a saddle stitcher can bind thousands of copies per hour, which keeps production costs low. Second, it lays flat when opened, unlike perfect binding, which fights you when you try to hold a page open. Third, it’s mechanically simple—no glue, no complex spine preparation—which makes it reliable and cheaper at every quantity level.
Beyond Saddle Stitching: Perfect Bound and Staple-Less Options
Once your project exceeds roughly 64 pages, saddle stitching stops being practical. Perfect binding replaces staples with hot-melt adhesive applied to the spine edge, creating a flat, squared-off back. This is the binding of trade paperbacks and thick magazines. It looks professional and allows for spine printing (title, author, logo), but it’s more expensive, takes longer, and the book won’t lie flat on its own.
Staple-less binding —sometimes called notch binding or fold-only binding—uses no metal at all. Pages are folded and interlocked along the spine through a series of small cuts and folds. It’s niche, aesthetically striking, and perfect if you’re making a minimalist art zine or an eco-branded publication where the absence of metal staples is part of the story. The catch: it only works for very thin publications (typically under 16 pages) and requires specialized finishing equipment.
Paper Types: The Texture That Shapes the Experience
Uncoated paper (offset/woodfree) is the zine maker’s best friend. It has a natural, slightly textured surface that absorbs ink gently rather than letting it sit on top. Colors look softer—more like a screen print than a magazine photo. Fingers don’t leave prints. Writing in the margins with a pencil or ballpoint pen works beautifully, which matters if your zine includes worksheets, prompts, or space for reader notes. For most zines, 80–120 gsm uncoated is the sweet spot: substantial enough to avoid show-through, light enough to keep postage reasonable.
Coated papers (glossy, silk, matte) excel when image quality is the priority. A thin coating seals the paper surface so ink droplets sit precisely where they land rather than spreading into the fibers. The result is sharper text, richer blacks, and photos that pop. If your zine is photo-heavy or your newsletter includes detailed charts and branded color palettes, coated stock is the right call. Just know that coated paper feels slicker and more commercial—which is either exactly what you want or exactly what you’re trying to avoid, depending on the project.
How Small-Batch Printing Actually Works
Digital vs. Offset: The Real Trade-Off at Low Quantities
For runs under 500 copies, digital printing almost always wins on cost and speed. Digital presses don’t need plates, don’t need makeready (the setup waste that offset requires), and can go from file to finished booklet in hours rather than days. The per-unit cost stays flat regardless of quantity—50 copies costs roughly 50 times the unit price of one copy.
Offset printing becomes economical somewhere around 500–1,000 copies, depending on the project. Offset uses aluminum plates burned with your page images; those plates transfer ink to a rubber blanket, which then presses it onto paper. The plate-making step adds a fixed upfront cost, but once you’ve cleared that hurdle, each additional copy is very cheap. For a 2,000-copy newsletter run, offset will beat digital on per-unit cost, and the print quality—especially on large solid color areas and fine gradients—will be noticeably better.
China’s advantage for small-batch printing comes from a few structural factors. Paper mills are closer. Finishing labor—folding, stitching, trimming—costs less while maintaining high skill levels. Digital press capacity has been aggressively expanded. The result: you can order 100 saddle-stitched zines from a Chinese printer for roughly what 25–50 copies would cost through a domestic US or European shop, shipping included.
Digital Proofing: Seeing Before You Commit
Printing across an ocean makes proofing essential—you can’t just pop into the shop and check a press sheet. Most Chinese printers now offer digital PDF proofs (soft proofs) within 24 hours of receiving your files. These show layout, pagination, and trim marks but can’t reproduce exact colors since your screen and the press use different color spaces.
The next step up is a hard copy proof —a physical sample printed on the actual press (or a calibrated digital proofer), couriered to you. This takes 3–5 days via express shipping and costs roughly $30–60, but it’s the only way to verify color accuracy, paper feel, and binding quality before the full run goes into production. For a first-time order or a project with critical color requirements (branded newsletters, art zines where color accuracy matters), a hard proof is well worth the time and money.
Some printers also offer dummy books —blank-paged mockups using your exact paper and binding specifications. These won’t show your content, but they let you hold the finished object in your hands: feel the cover stock, test how the pages turn, check whether the spine thickness feels right. Dummy books cost more than paper proofs but less than a full mistake run.
What a Small Run Actually Costs
Let’s talk numbers—not firm quotes, because every project varies, but realistic ranges based on what’s happening in the market right now.
A 24-page A5 zine, saddle-stitched, self-cover, 100 gsm uncoated, full-color digital, 100 copies: expect roughly $1.50–$2.50 per copy, or $150–$250 total, before shipping. Add a 250 gsm cardstock cover with matte lamination and you might be looking at $2.00–$3.00 per copy. A 4-page A4 newsletter, 128 gsm silk coated, full-color offset, 500 copies: roughly $0.80–$1.20 per copy. Scale that to 2,000 copies and the per-unit cost drops below $0.50.
Shipping is the variable that catches people off guard. Sea freight (25–35 days) is cheap—maybe $0.10–$0.20 per copy for a modest order—but the time commitment is real. Air express (3–7 days) is fast but adds $0.50–$1.00 per copy. Many creators split the difference: sea freight for the bulk order to a fulfillment warehouse, plus a small air-shipped batch for launch events or early sales.
The bottom line: printing in China makes the most financial sense when your per-unit saving (vs. local printing) exceeds the added shipping cost and extended timeline. For runs between 50 and 1,000 copies, that math usually works out—sometimes dramatically.
Preparing Your Files: Small Details That Prevent Big Headaches
File Format and Color Space
Send your printer a print-ready PDF with 3 mm bleed on all edges and crop marks. Bleed means your background images or colors extend past where the page will be trimmed—this prevents thin white slivers at the edges if the trimmer shifts by a fraction of a millimeter. No bleed, no clean edges. Simple as that.
Work in CMYK color space, not RGB. Your screen displays RGB; a printing press uses CMYK inks (cyan, magenta, yellow, black). Colors that look vibrant on screen—neon greens, deep purples, rich blues—can turn muddy when converted. If color accuracy matters, ask your printer for an ICC profile specific to their press and soft-proof your file against it in Photoshop or InDesign before exporting.
For images, 300 DPI at final print size is the standard. A 72 DPI web image stretched to fill an A5 page will print as a pixelated mess. Conversely, 600 DPI files are unnecessarily large and won’t improve print quality on standard offset or digital presses—they just make your upload take longer.
Page Count, Pagination, and the Dreaded Multiples-of-4 Rule
Write this down: your total page count must be divisible by 4 for saddle stitching. This includes the cover. A “24-page zine” means 24 numbered pages, counting the front cover as page 1 and the back cover as page 24. If your designed content comes to 22 pages, you either cut 2 pages, add 2 pages of content, or insert 2 blank pages—commonly placed after the inside front cover or before the inside back cover.
When preparing your PDF, send pages as single pages in reading order (1, 2, 3, 4…) rather than as printer spreads (where page 24 and page 1 sit side by side on the same sheet). The printer’s prepress department handles imposition—the process of arranging your pages onto press sheets so they appear in the correct order after folding. Sending pre-imposed files usually creates more problems than it solves.
From Order to Delivery: The Timeline
A typical small-batch project moves through these stages:
Days 1–2: You send files. The printer’s prepress team checks them—bleed, resolution, font embedding, page count. If something’s off, they’ll flag it and send notes (budget a day or two for back-and-forth).
Days 2–5: If you’ve requested a hard proof, it’s printed and shipped via express courier. You review it, maybe make a small adjustment, and approve.
Days 5–10: Production. For digital runs, this is fast—a few hundred copies can be printed, folded, stitched, and trimmed in a day or two. For offset, add plate-making time but the press itself runs quickly once set up.
Days 10–15: Quality check, packing, and dispatch. Sea freight adds 3–5 weeks. Air express adds 3–7 days. If you’re planning a launch event or zine fest table, work backward from the date you need books in hand and add two weeks of buffer for the unexpected.
The whole cycle—from file submission to books arriving at your door via air—typically spans 2–3 weeks. Via sea freight, budget 5–7 weeks. Plan accordingly, and communicate deadlines clearly with your printer from the start.
Should You Print Your Zine or Newsletter in China?
Here’s a quick decision framework. Print in China if: you need fewer than 1,000 copies and local quotes are painful; you want saddle-stitched booklets with quality paper and finishing; you have 3–7 weeks before you need the books; you’re comfortable reviewing a PDF proof and trusting the process.
Print locally if: you need fewer than 25 copies (the shipping math doesn’t work); you need the books in less than 10 days; you need to physically inspect and approve a press sheet in person; your project involves highly complex die-cutting, specialty inks, or unusual materials that benefit from face-to-face collaboration.
For the majority of indie zine makers, small-press publishers, community organizations, and lean businesses we talk to, printing from China is the right call—not just for the savings, but for the quality and the range of options that become available at quantities that local shops won’t touch without a surcharge. You get to focus on what you’re good at—making great content—while the production side happens at scale, professionally, and at a price that leaves room for your project to grow.